
Molly + Cooper’s Quilt
Karen, a returning client and studio friend, reached out to design a memorial quilt for her two deeply loved furry family members— Molly and Cooper, who’d recently passed. 💔
It was an instant yes for me.
Over the course of the project we had multiple virtual design sessions to discuss aesthetics, pattern, materials and color palette.
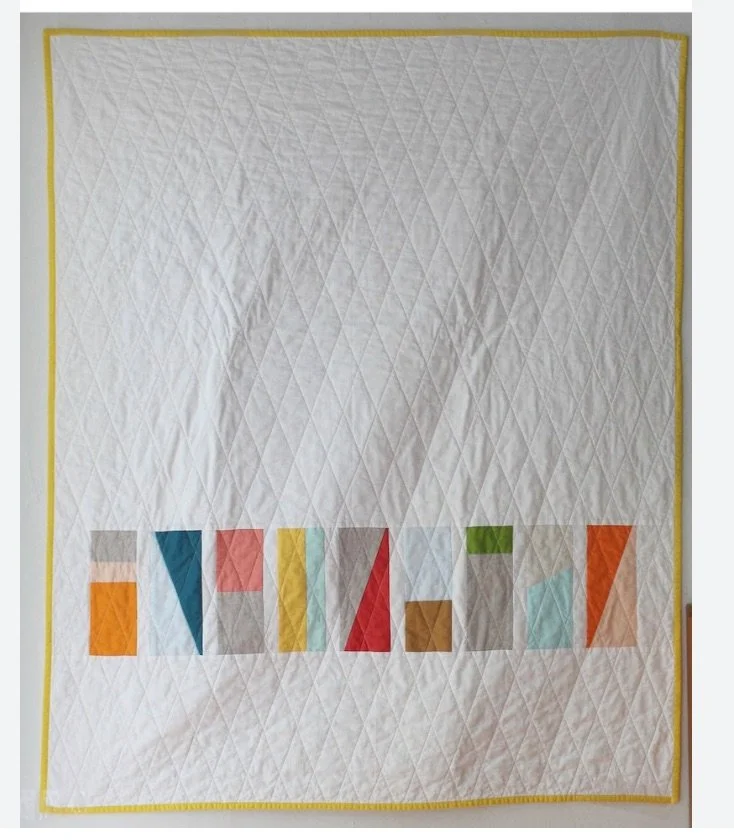
After our initial planning session, I sent Karen an array of inspiration images to mull over— and this one was an instant standout. So much so, we planned to mimic the pattern as closely as possible.
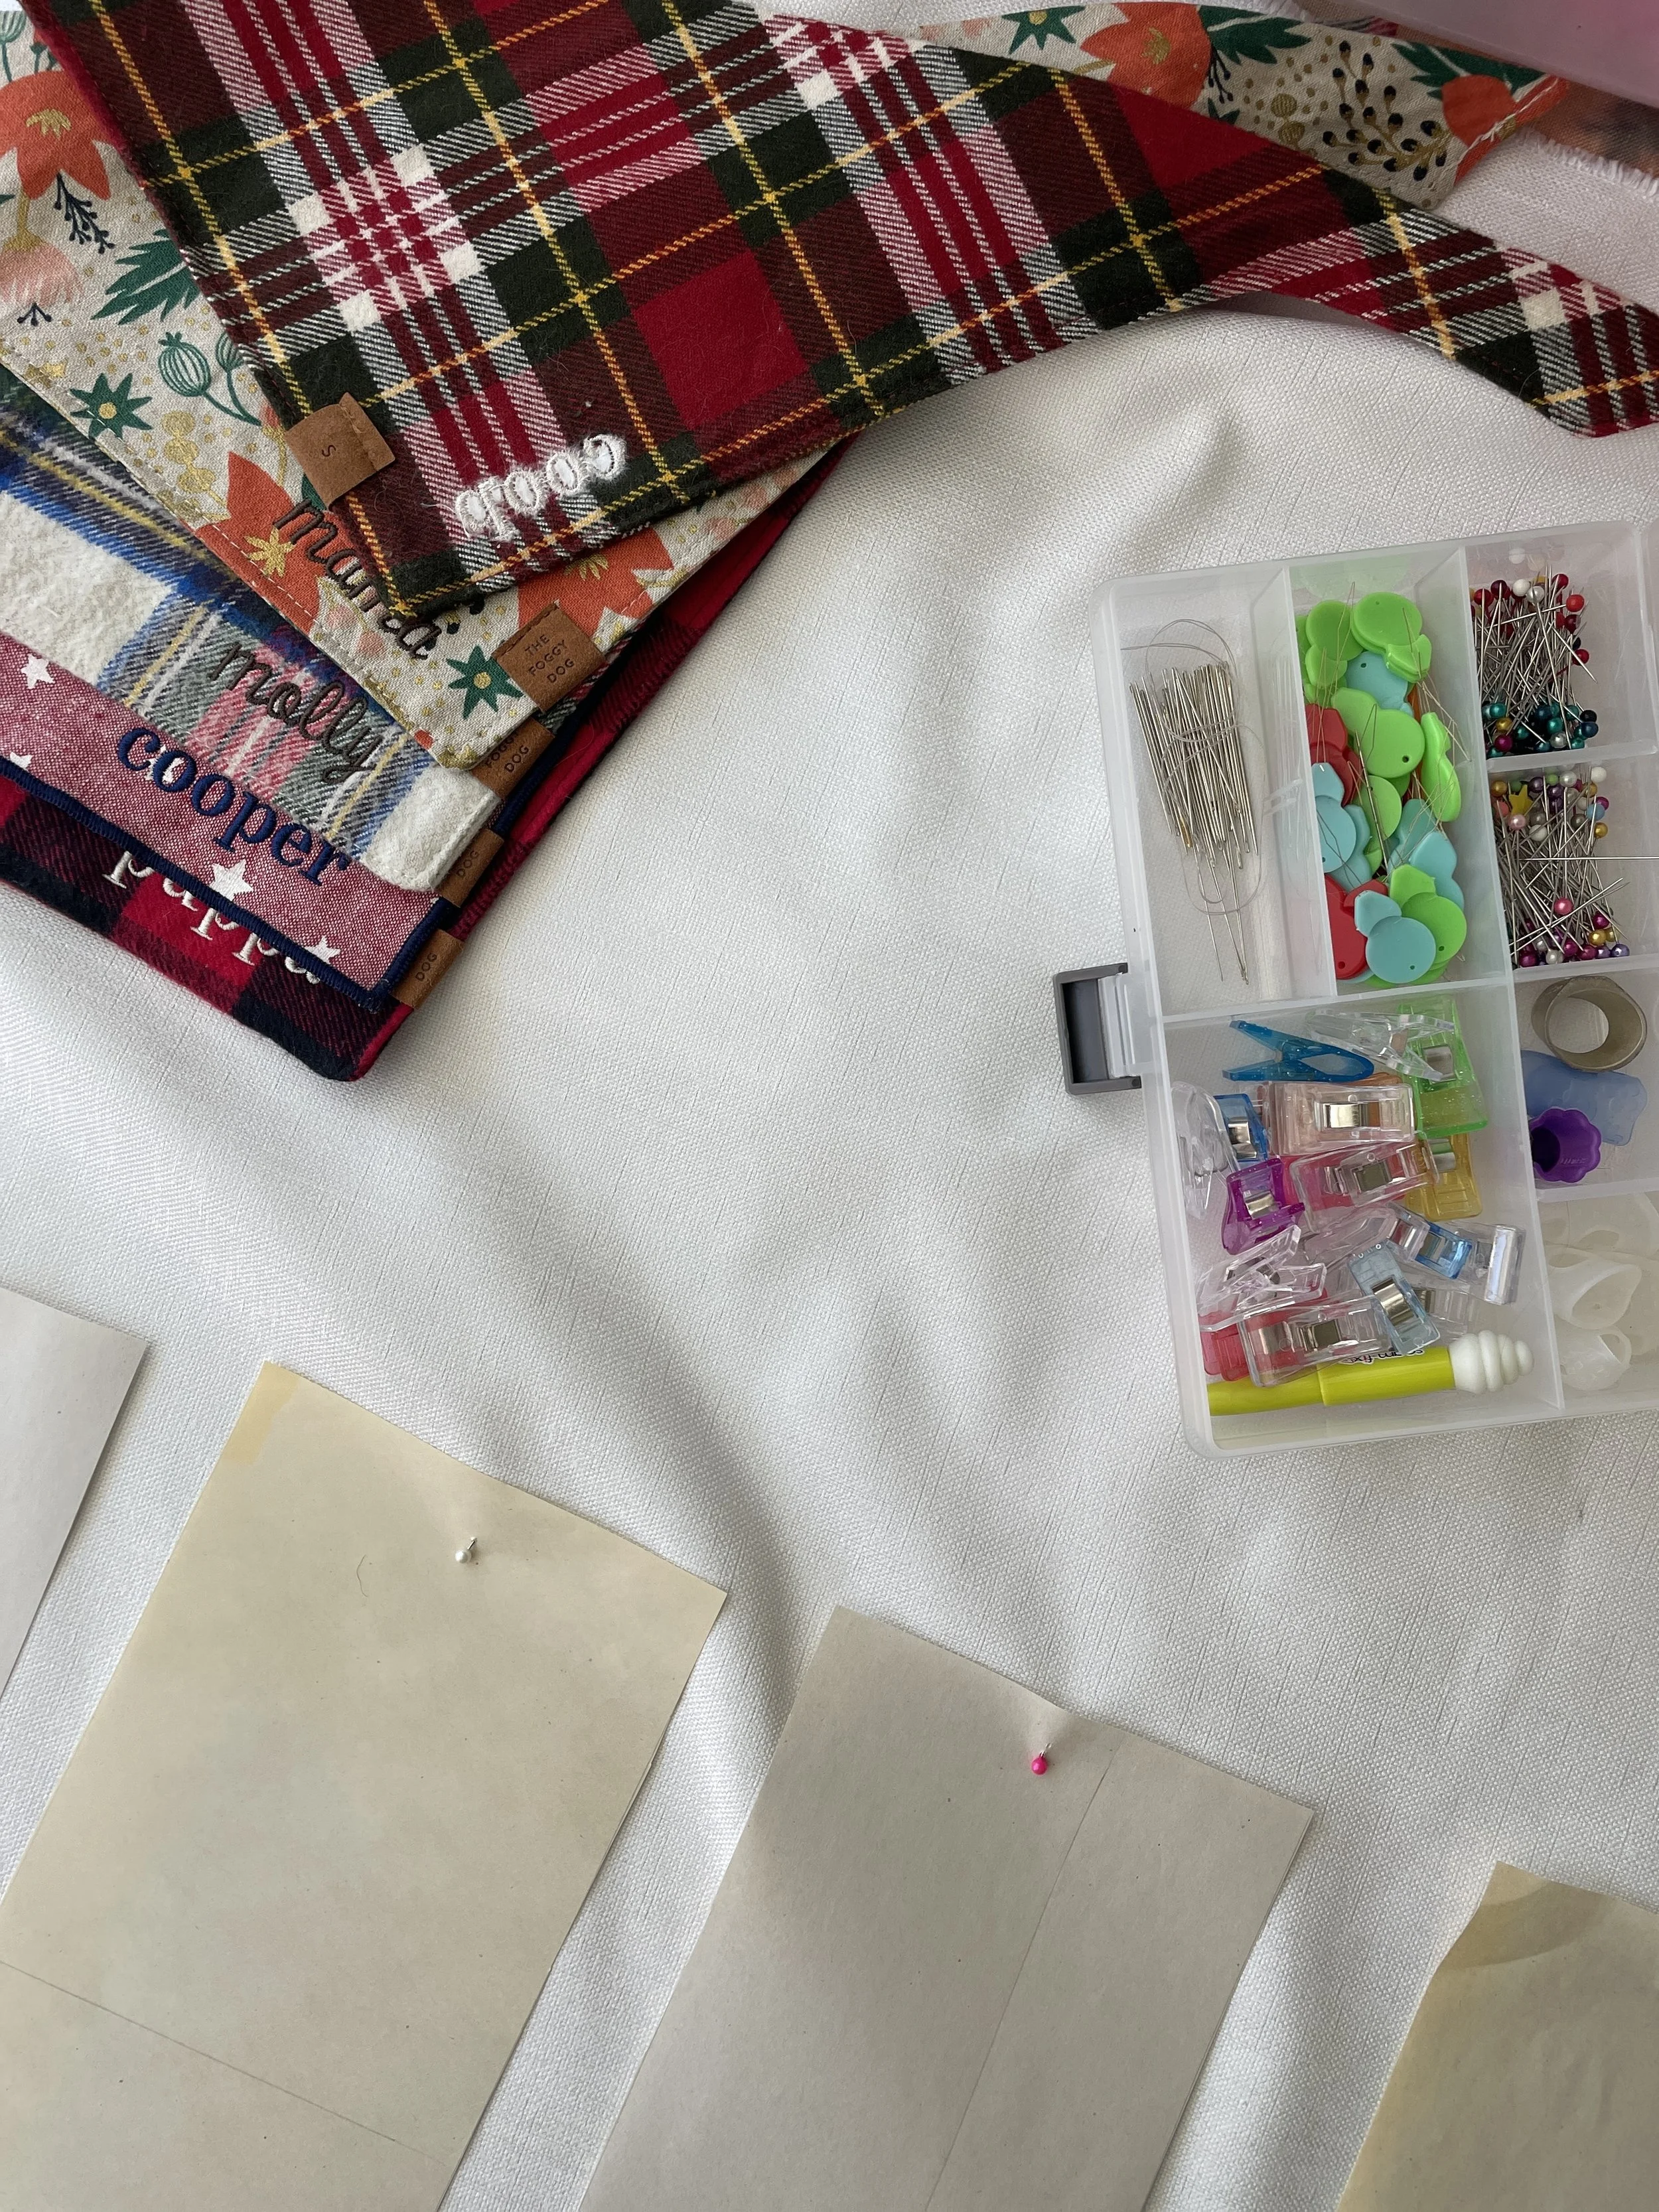
Karen mailed me Molly and Cooper’s doggy bandana collection, to be used as part of the colorful rectangular designs.
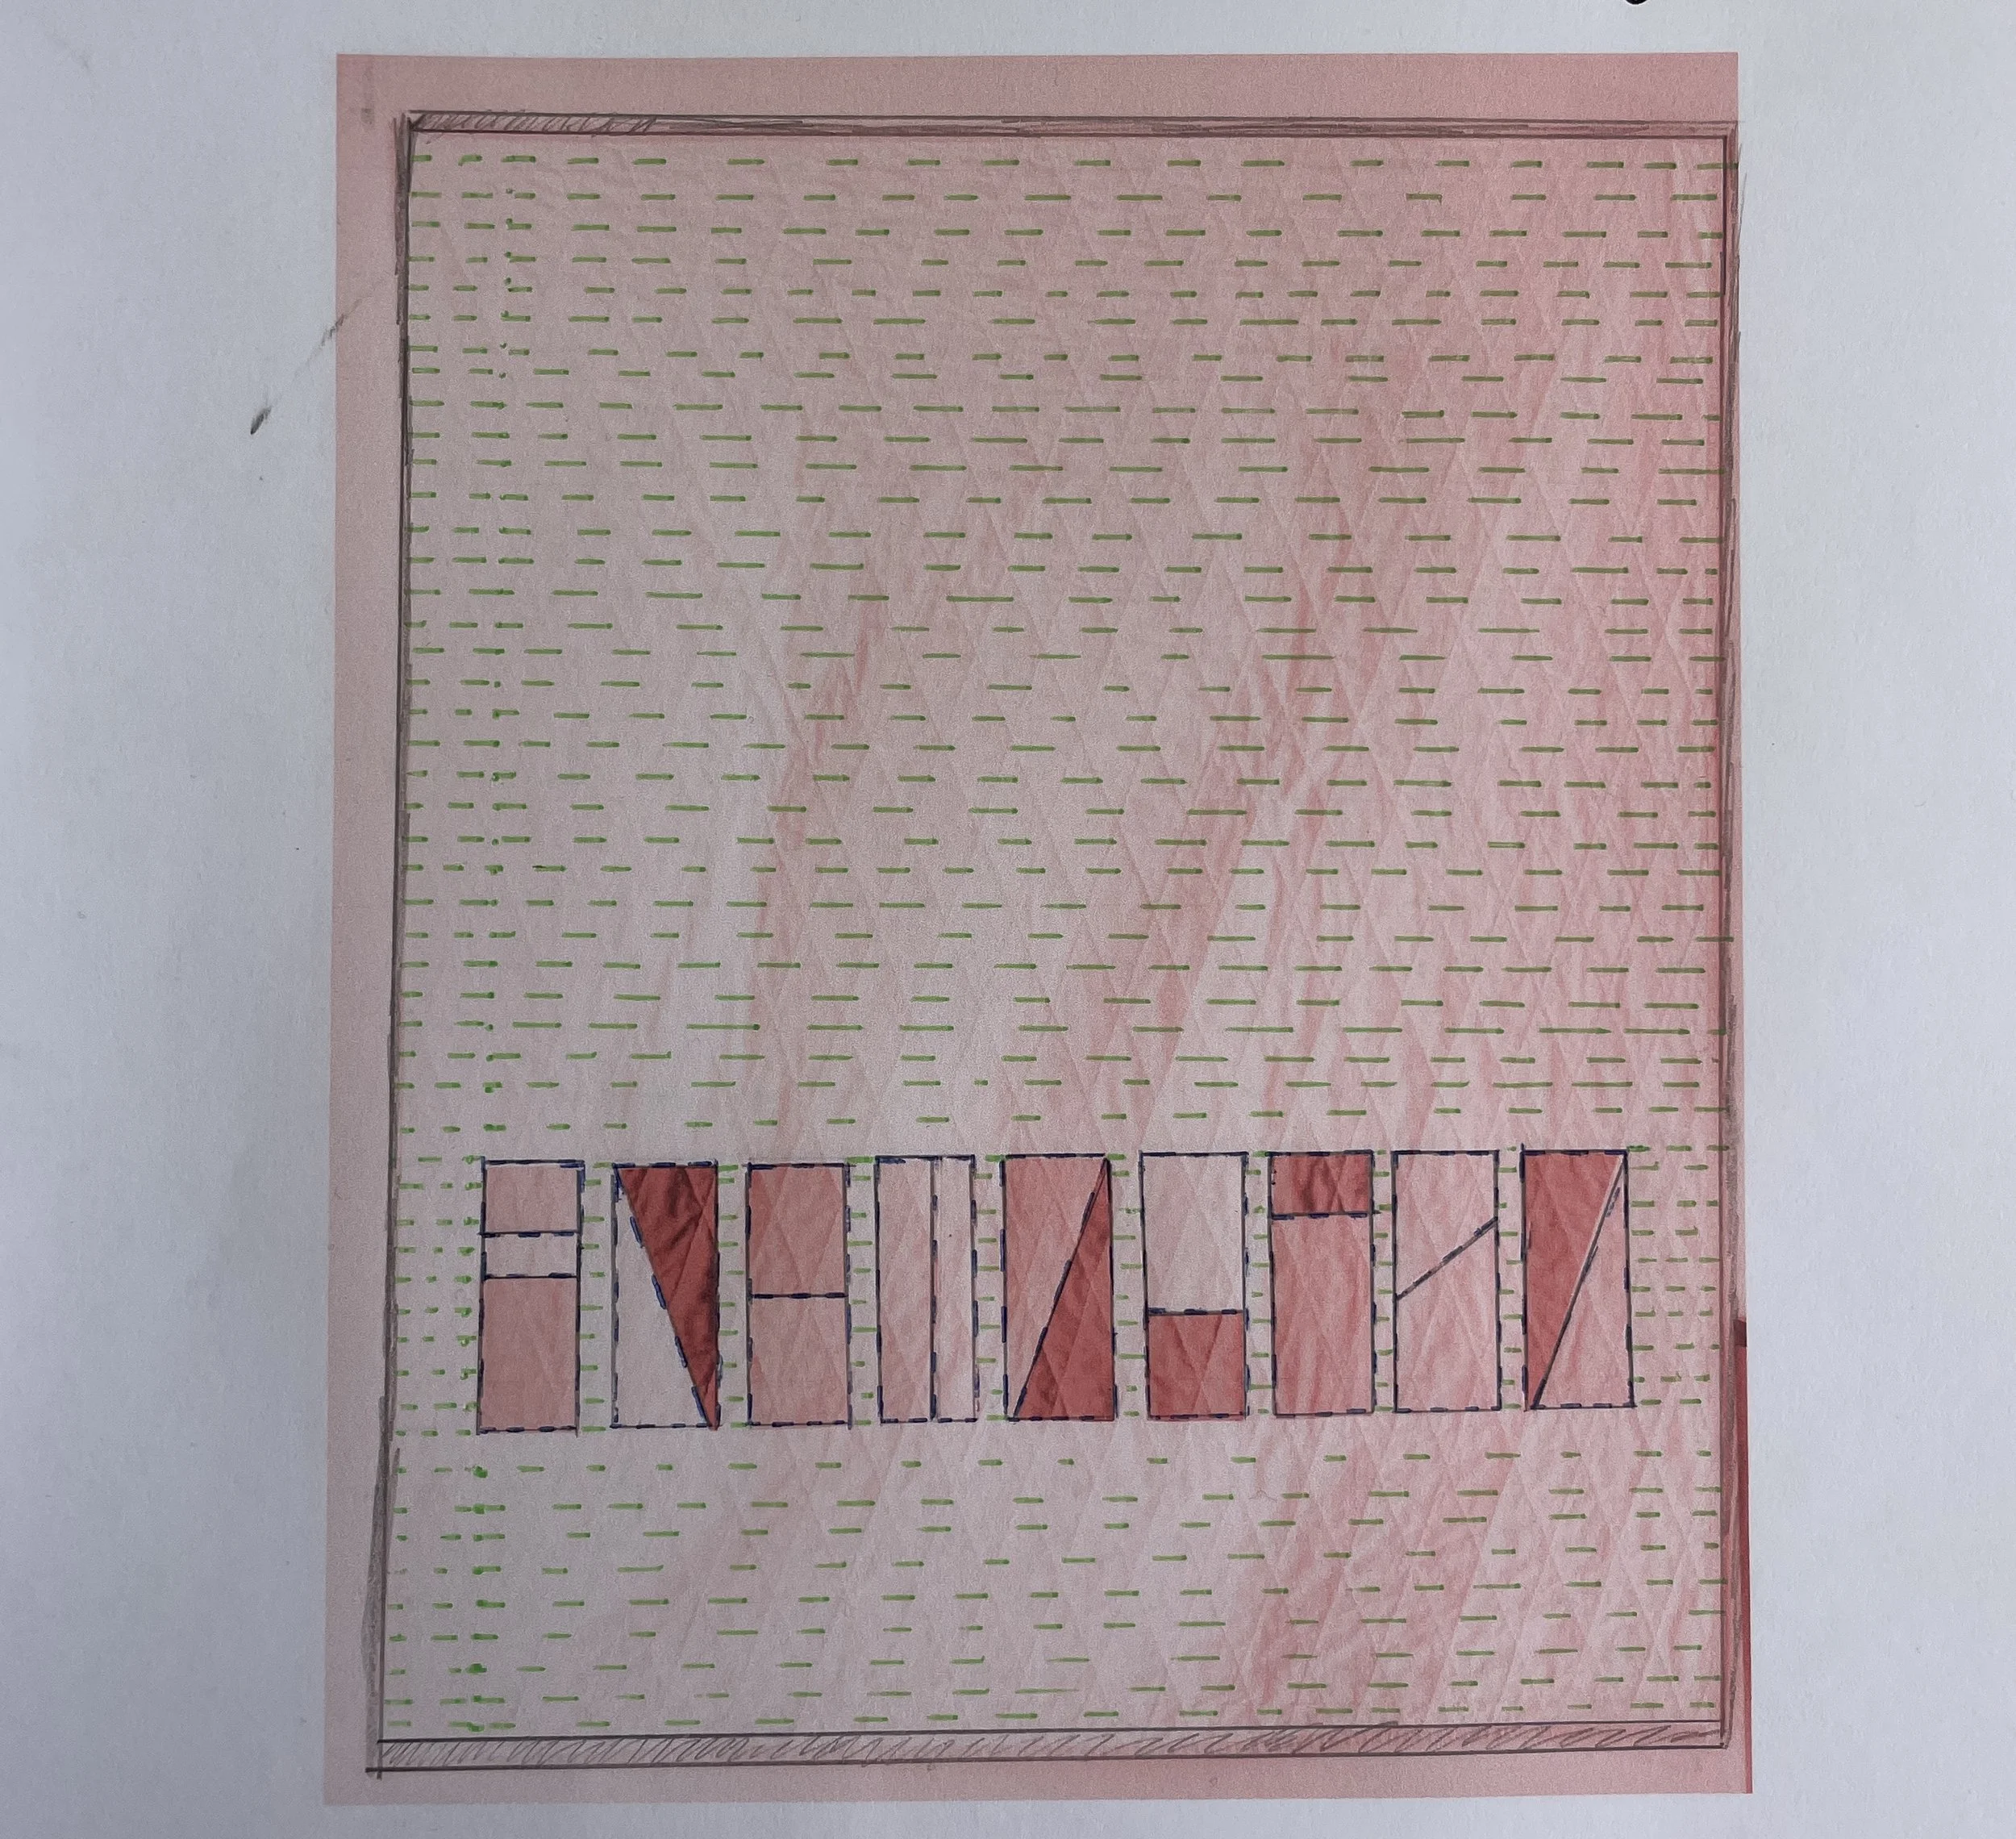
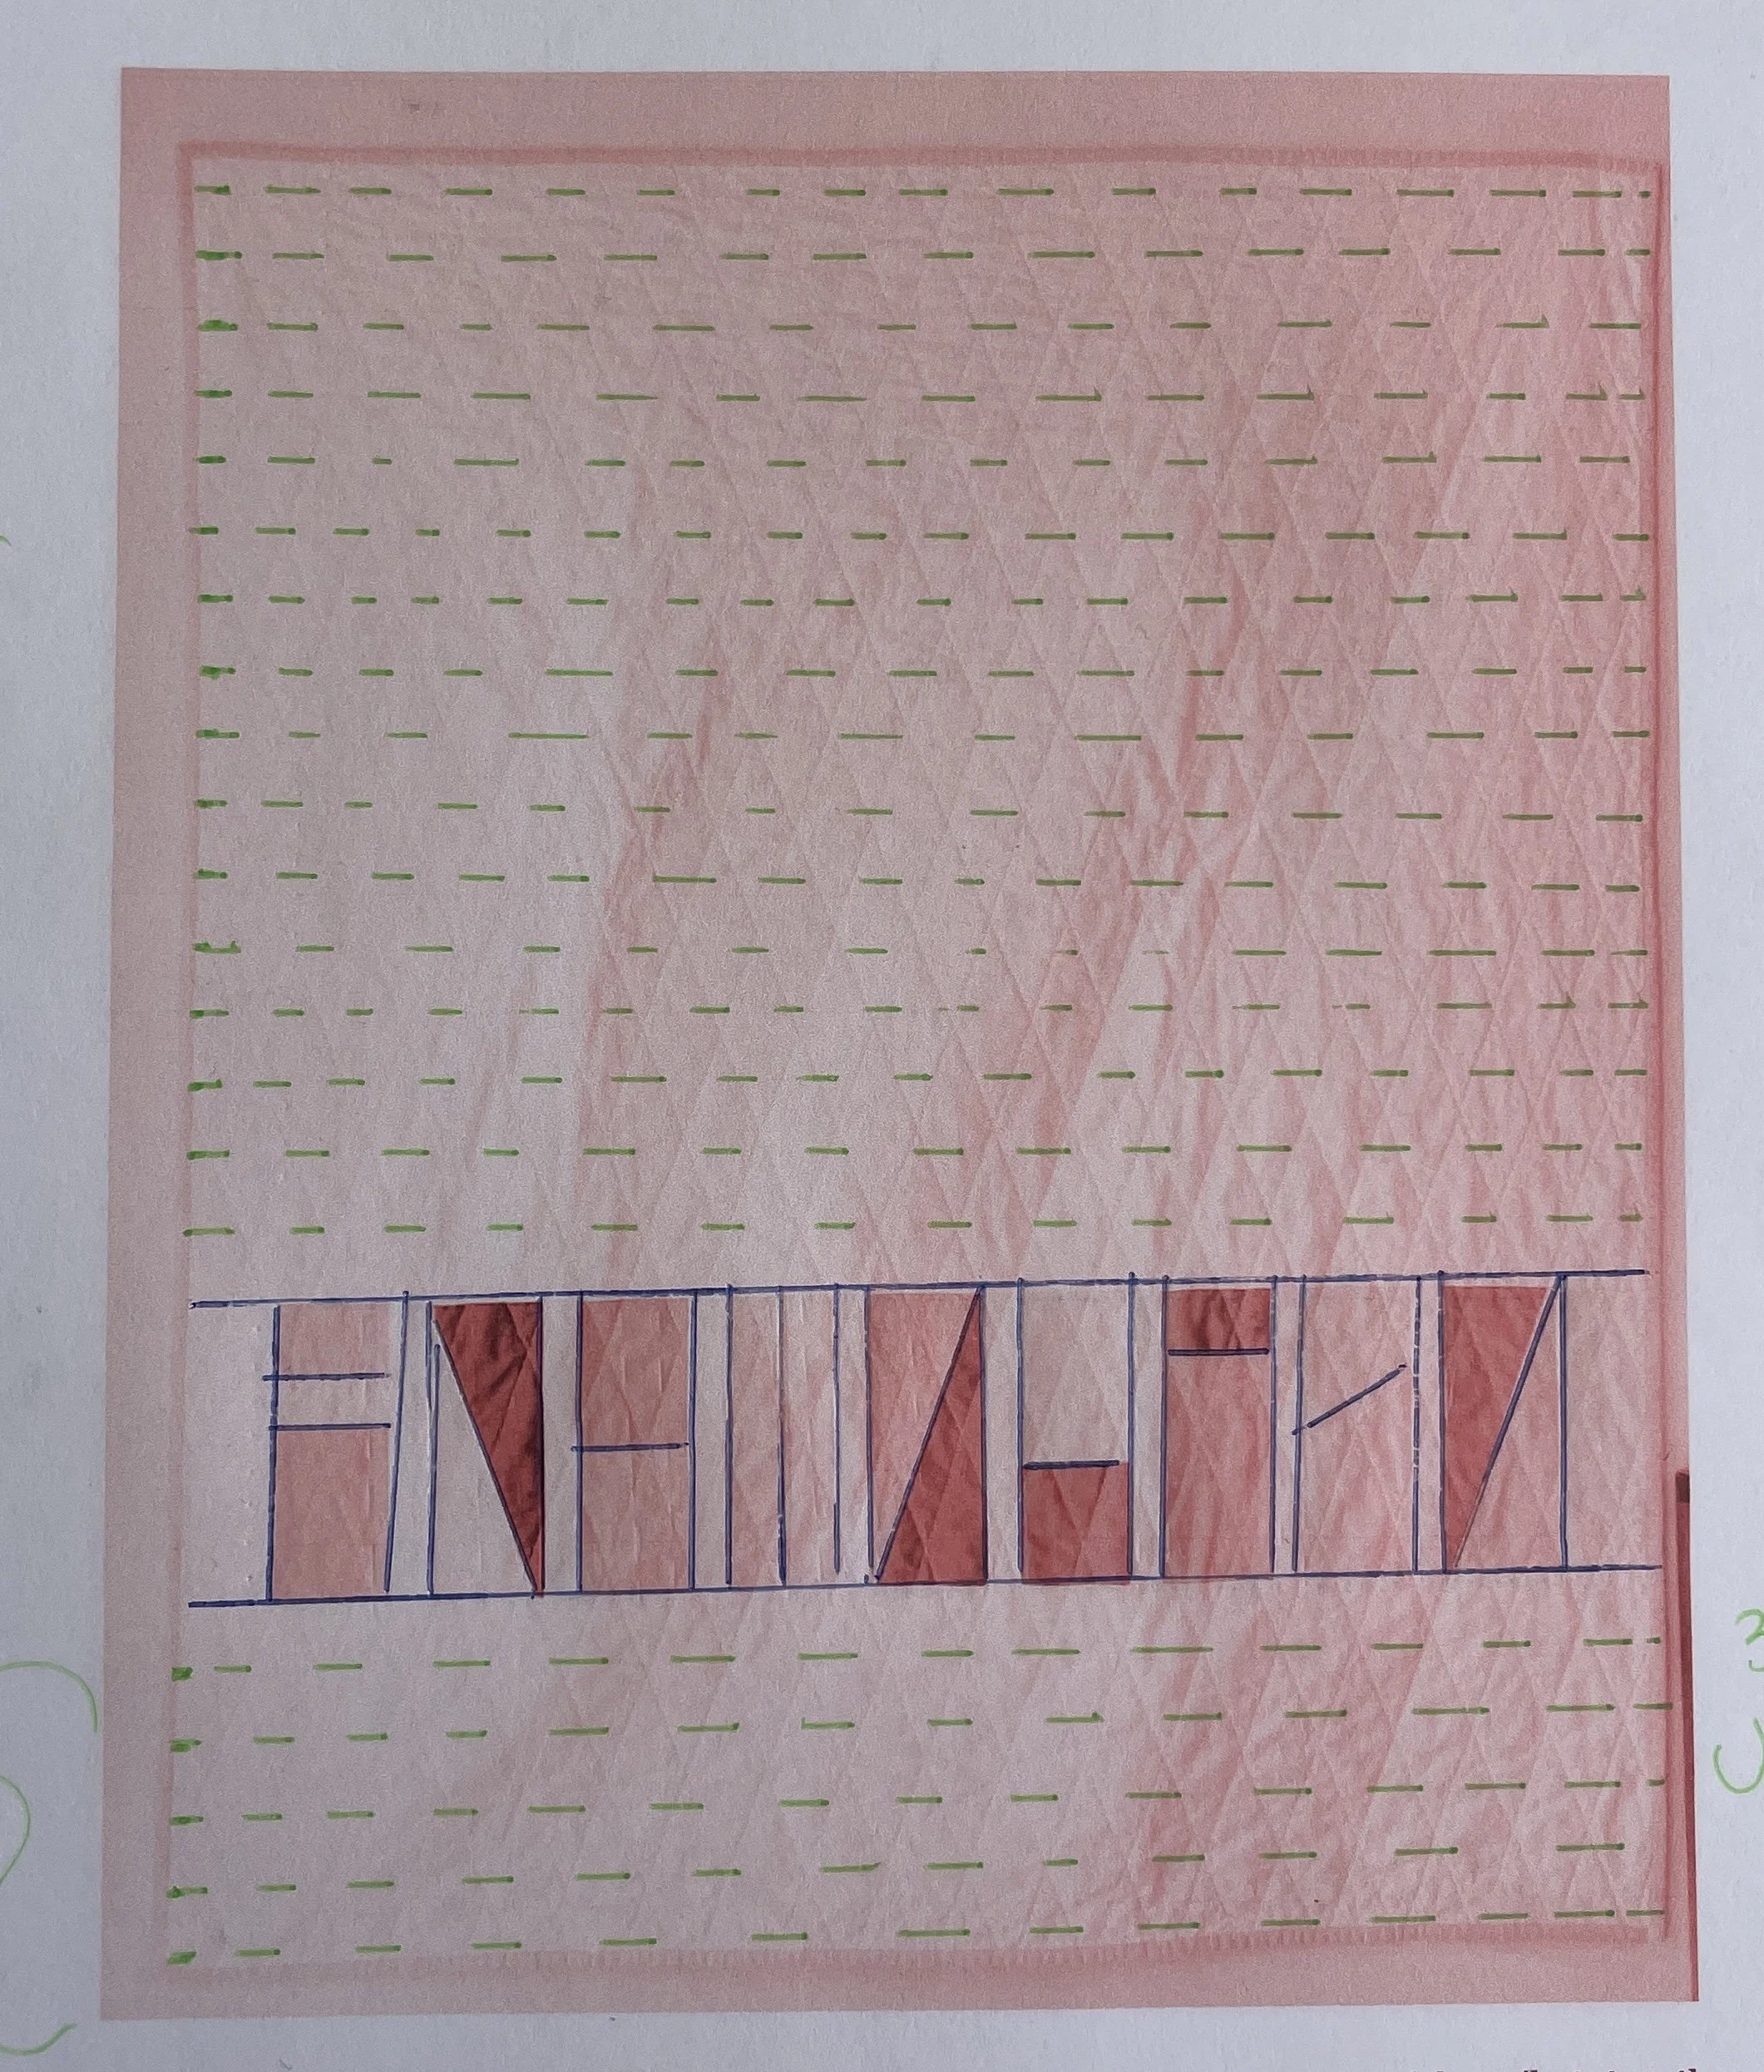
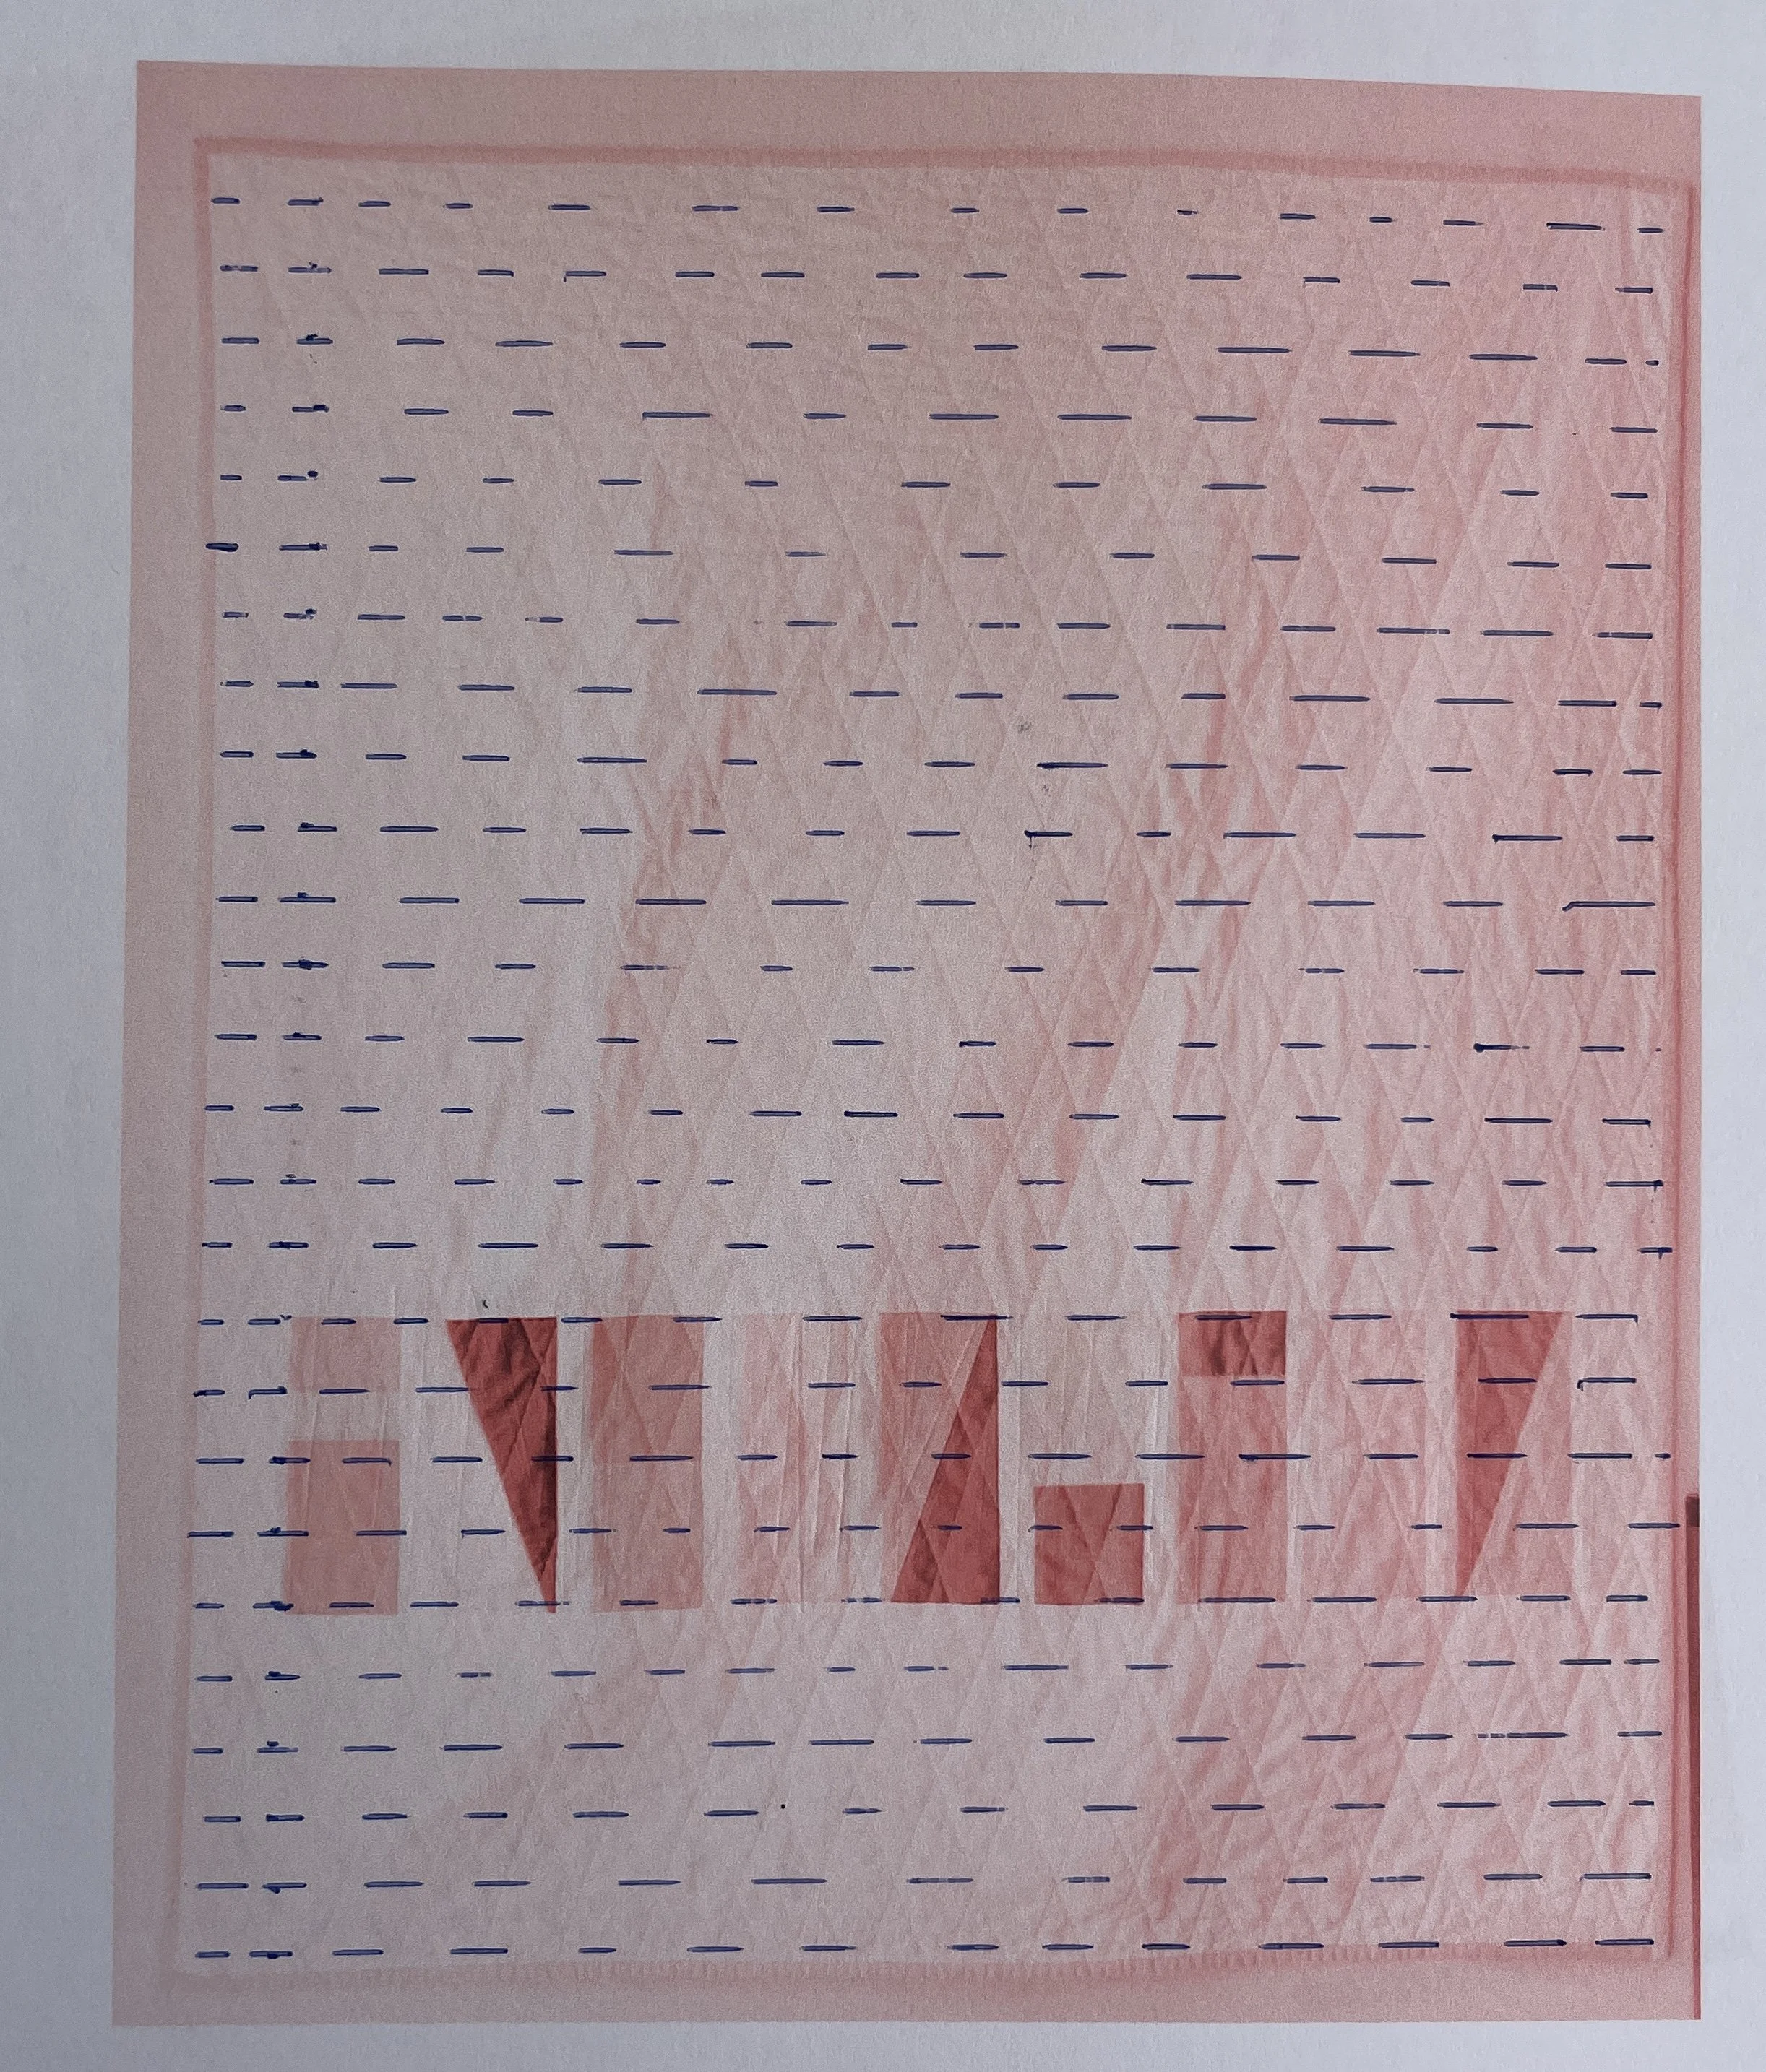
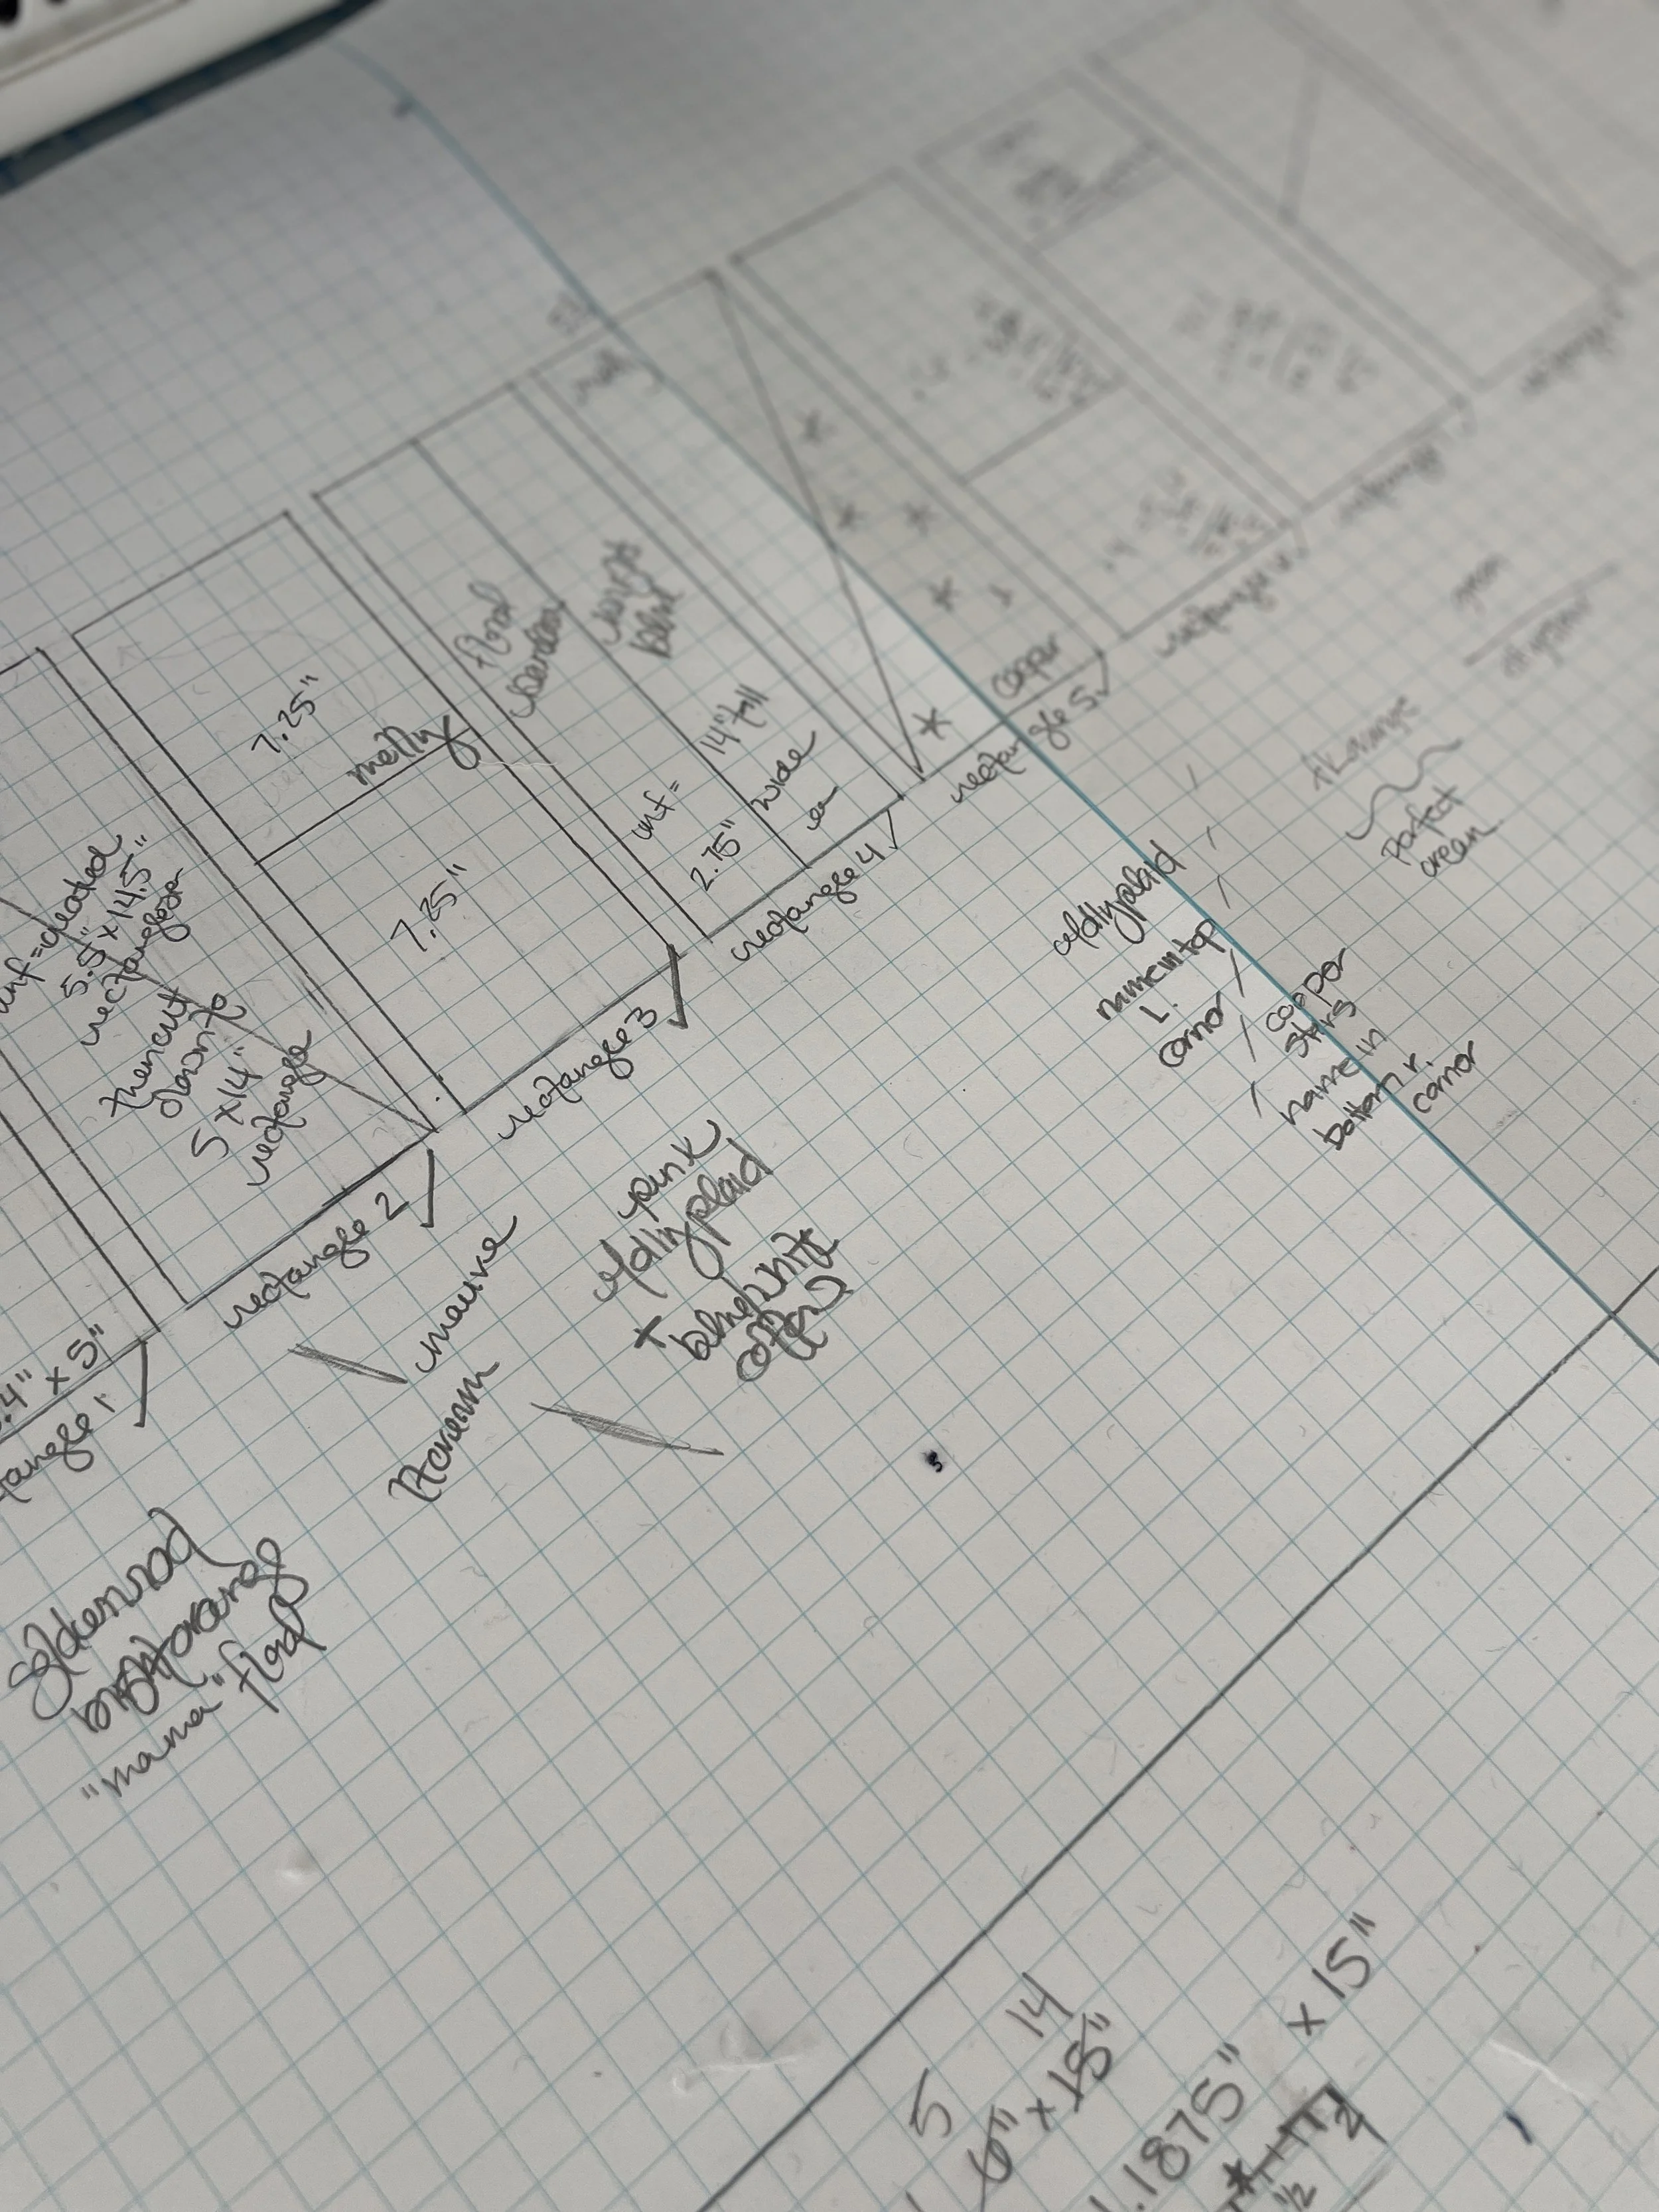
I sketched variations of quilting and backing options to offer/explore possibilities:


Once we had the exact design:
simple and clean; lean into neutrals while showcasing bandanas
whole cloth backing: single color, natural linen
hand quilting; double diagonal design, 2” spacing
dimensions: 66” x 90”
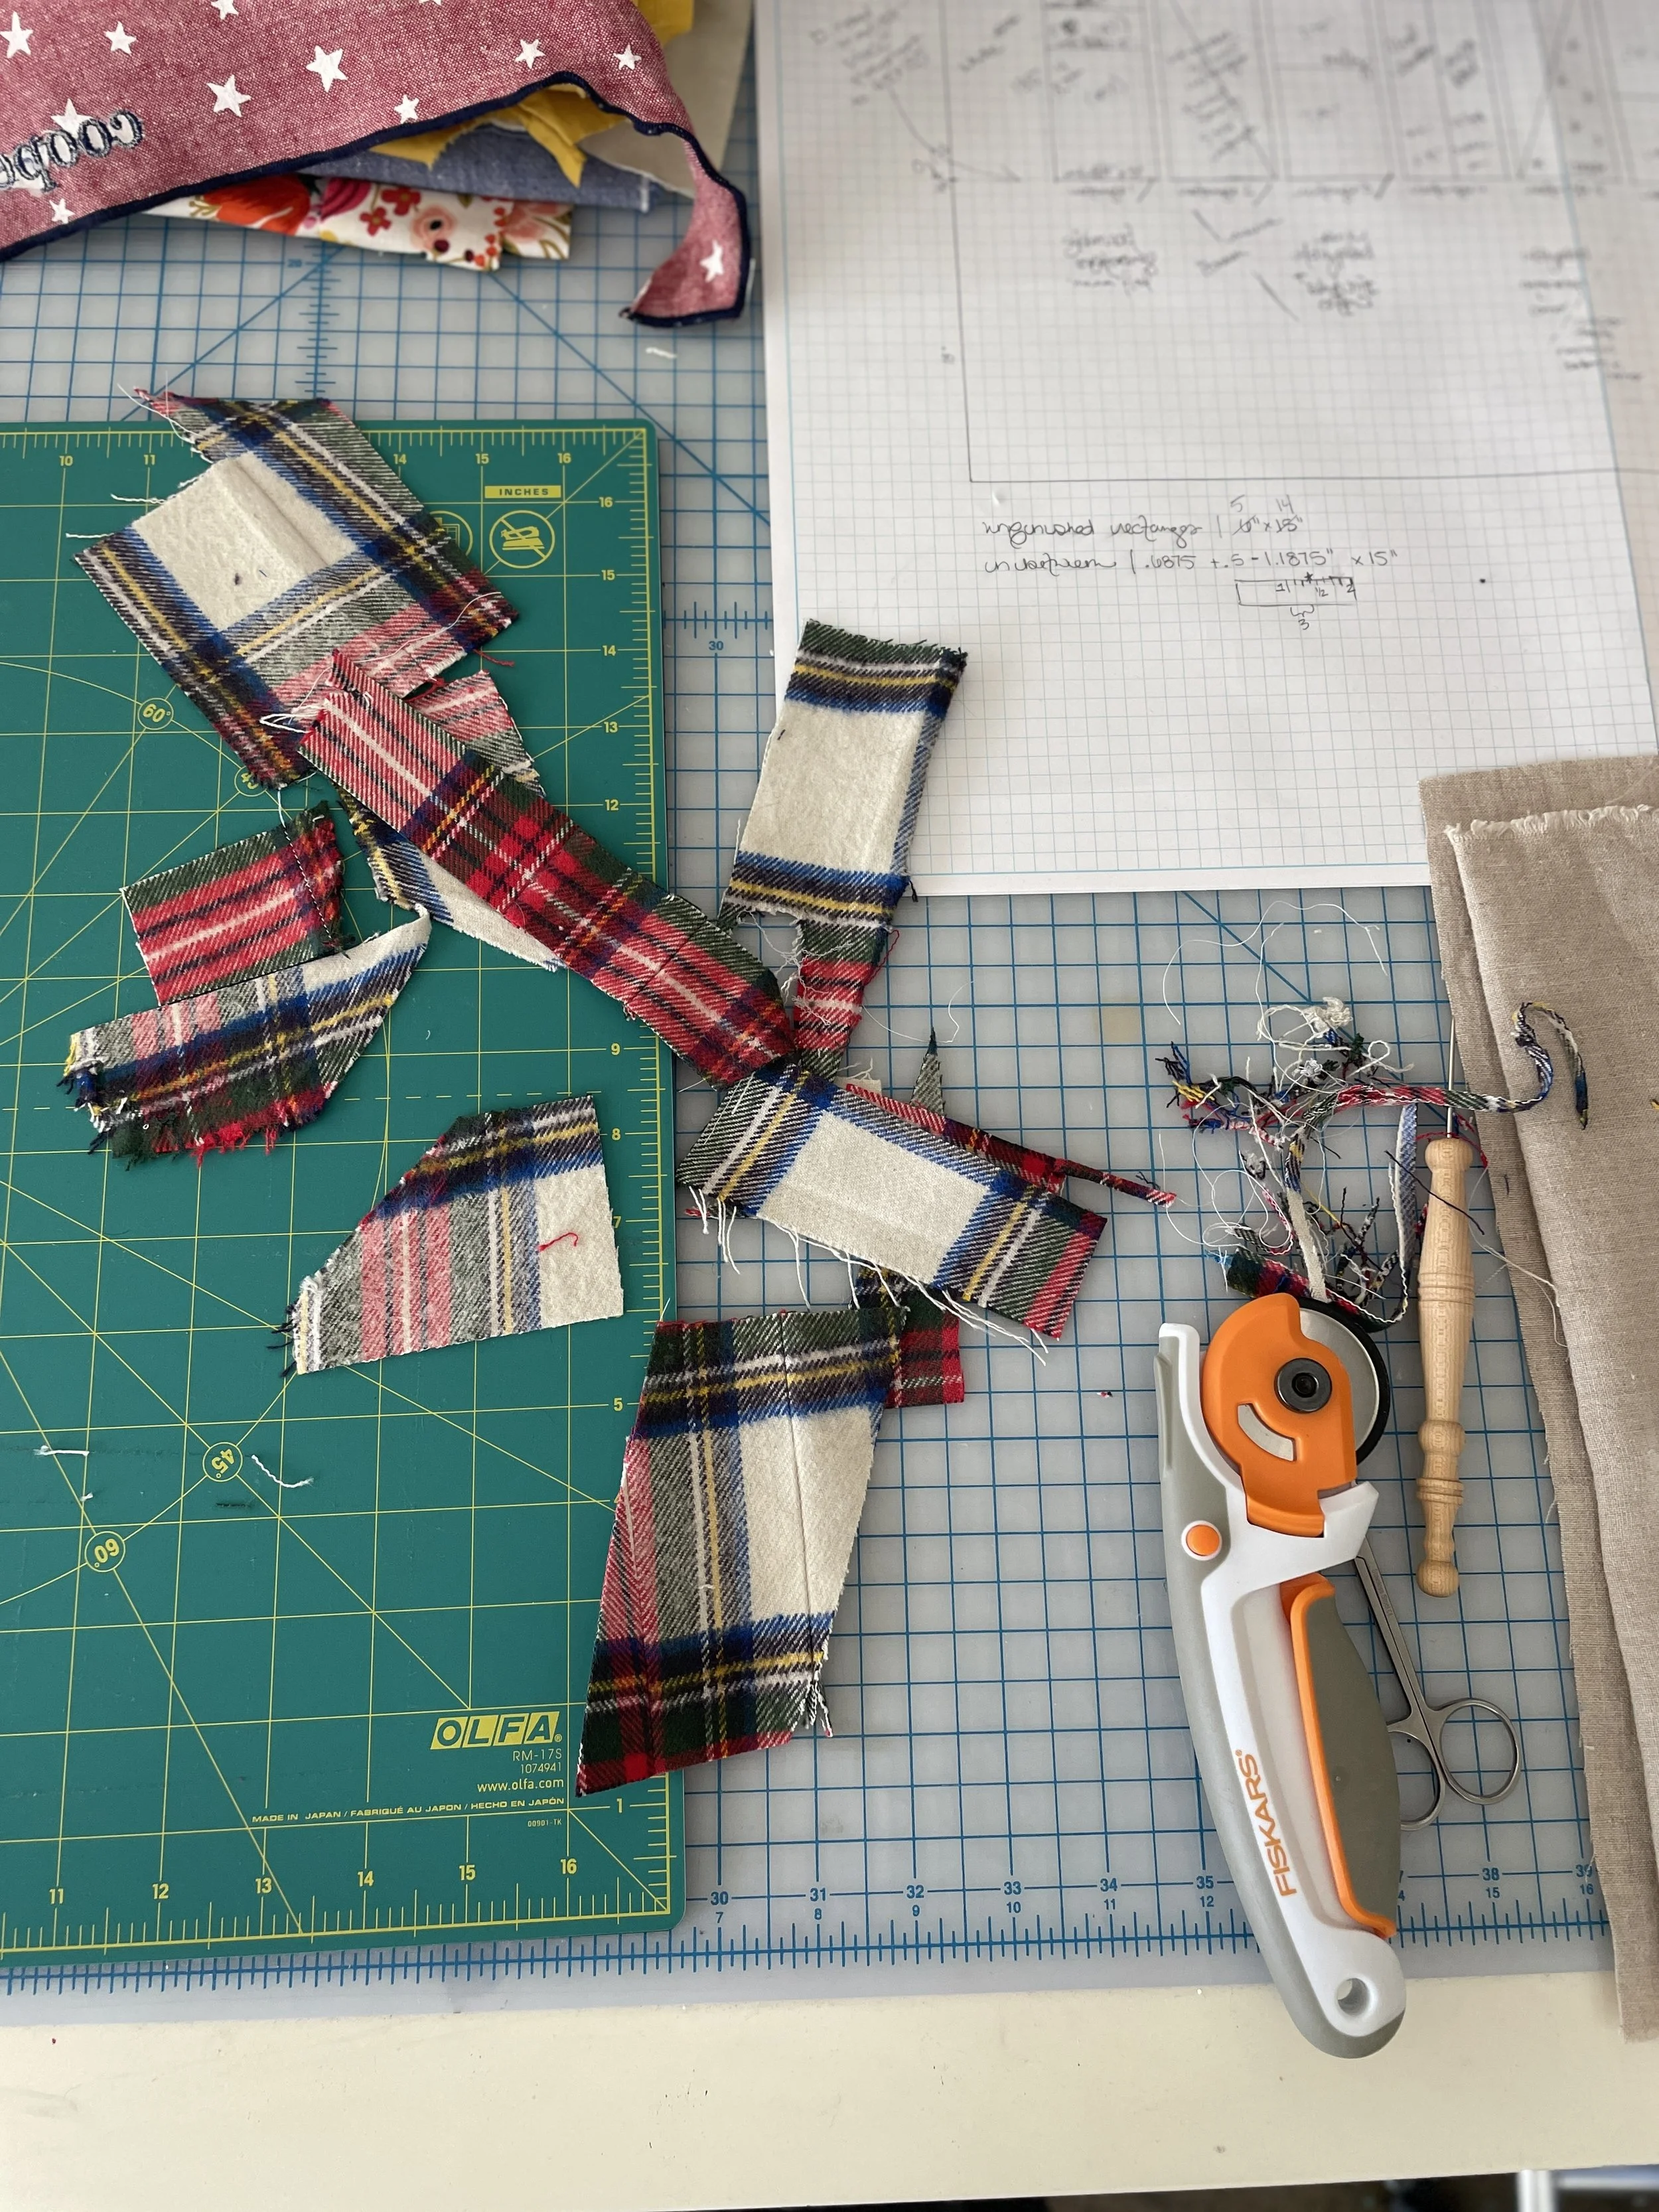
I grabbed my ruler and graph paper and started mathematically breaking down the dimensions for each section based on ratios. Since I didn’t create the original reference quilt, the actual measurements used for the pattern were unknown. And I wanted my replica to be as exact as possible.
Handily, I spent a lot of time in a 4th grade classroom this year {a story for another day} and got a brush up in Singapore Math Geometry— which made breaking down the design a mathematical snap, with some basic addition/subtraction/multiplication.
Each square on the graph paper is the equivalent of 1” of fabric.

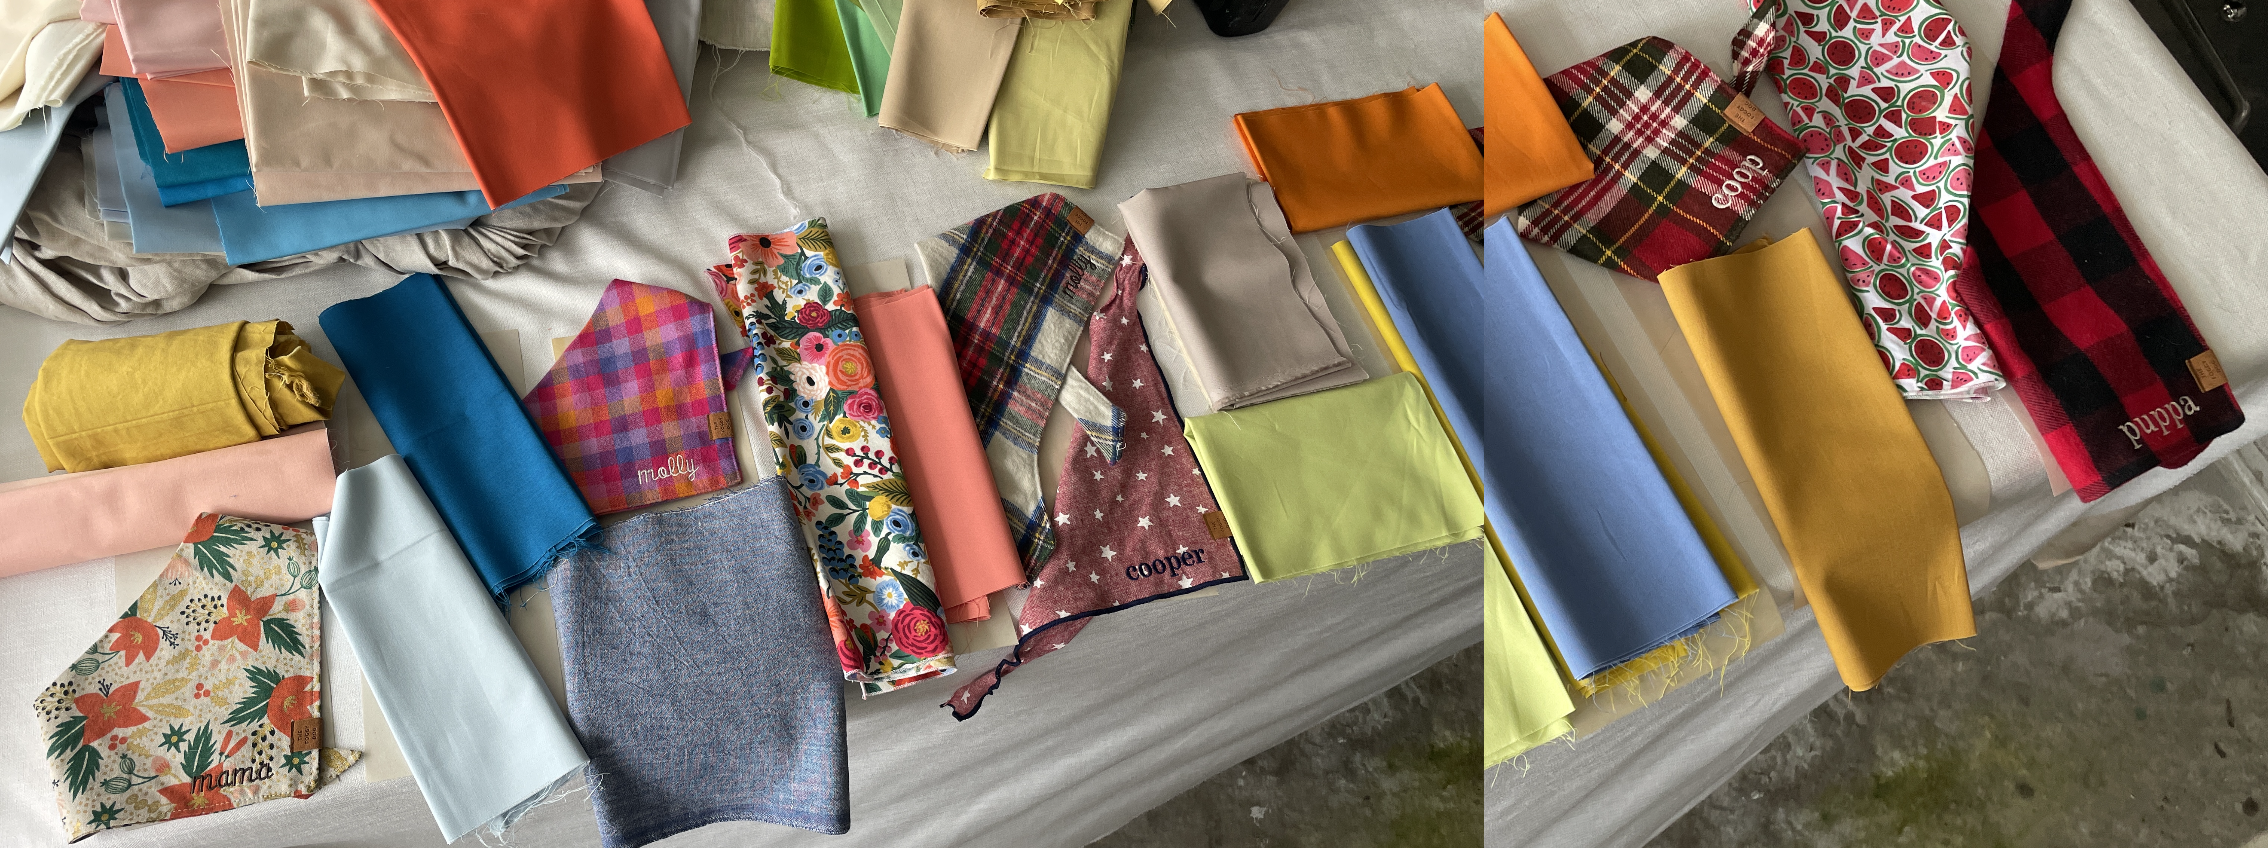
Molly and Cooper’s bandanas:

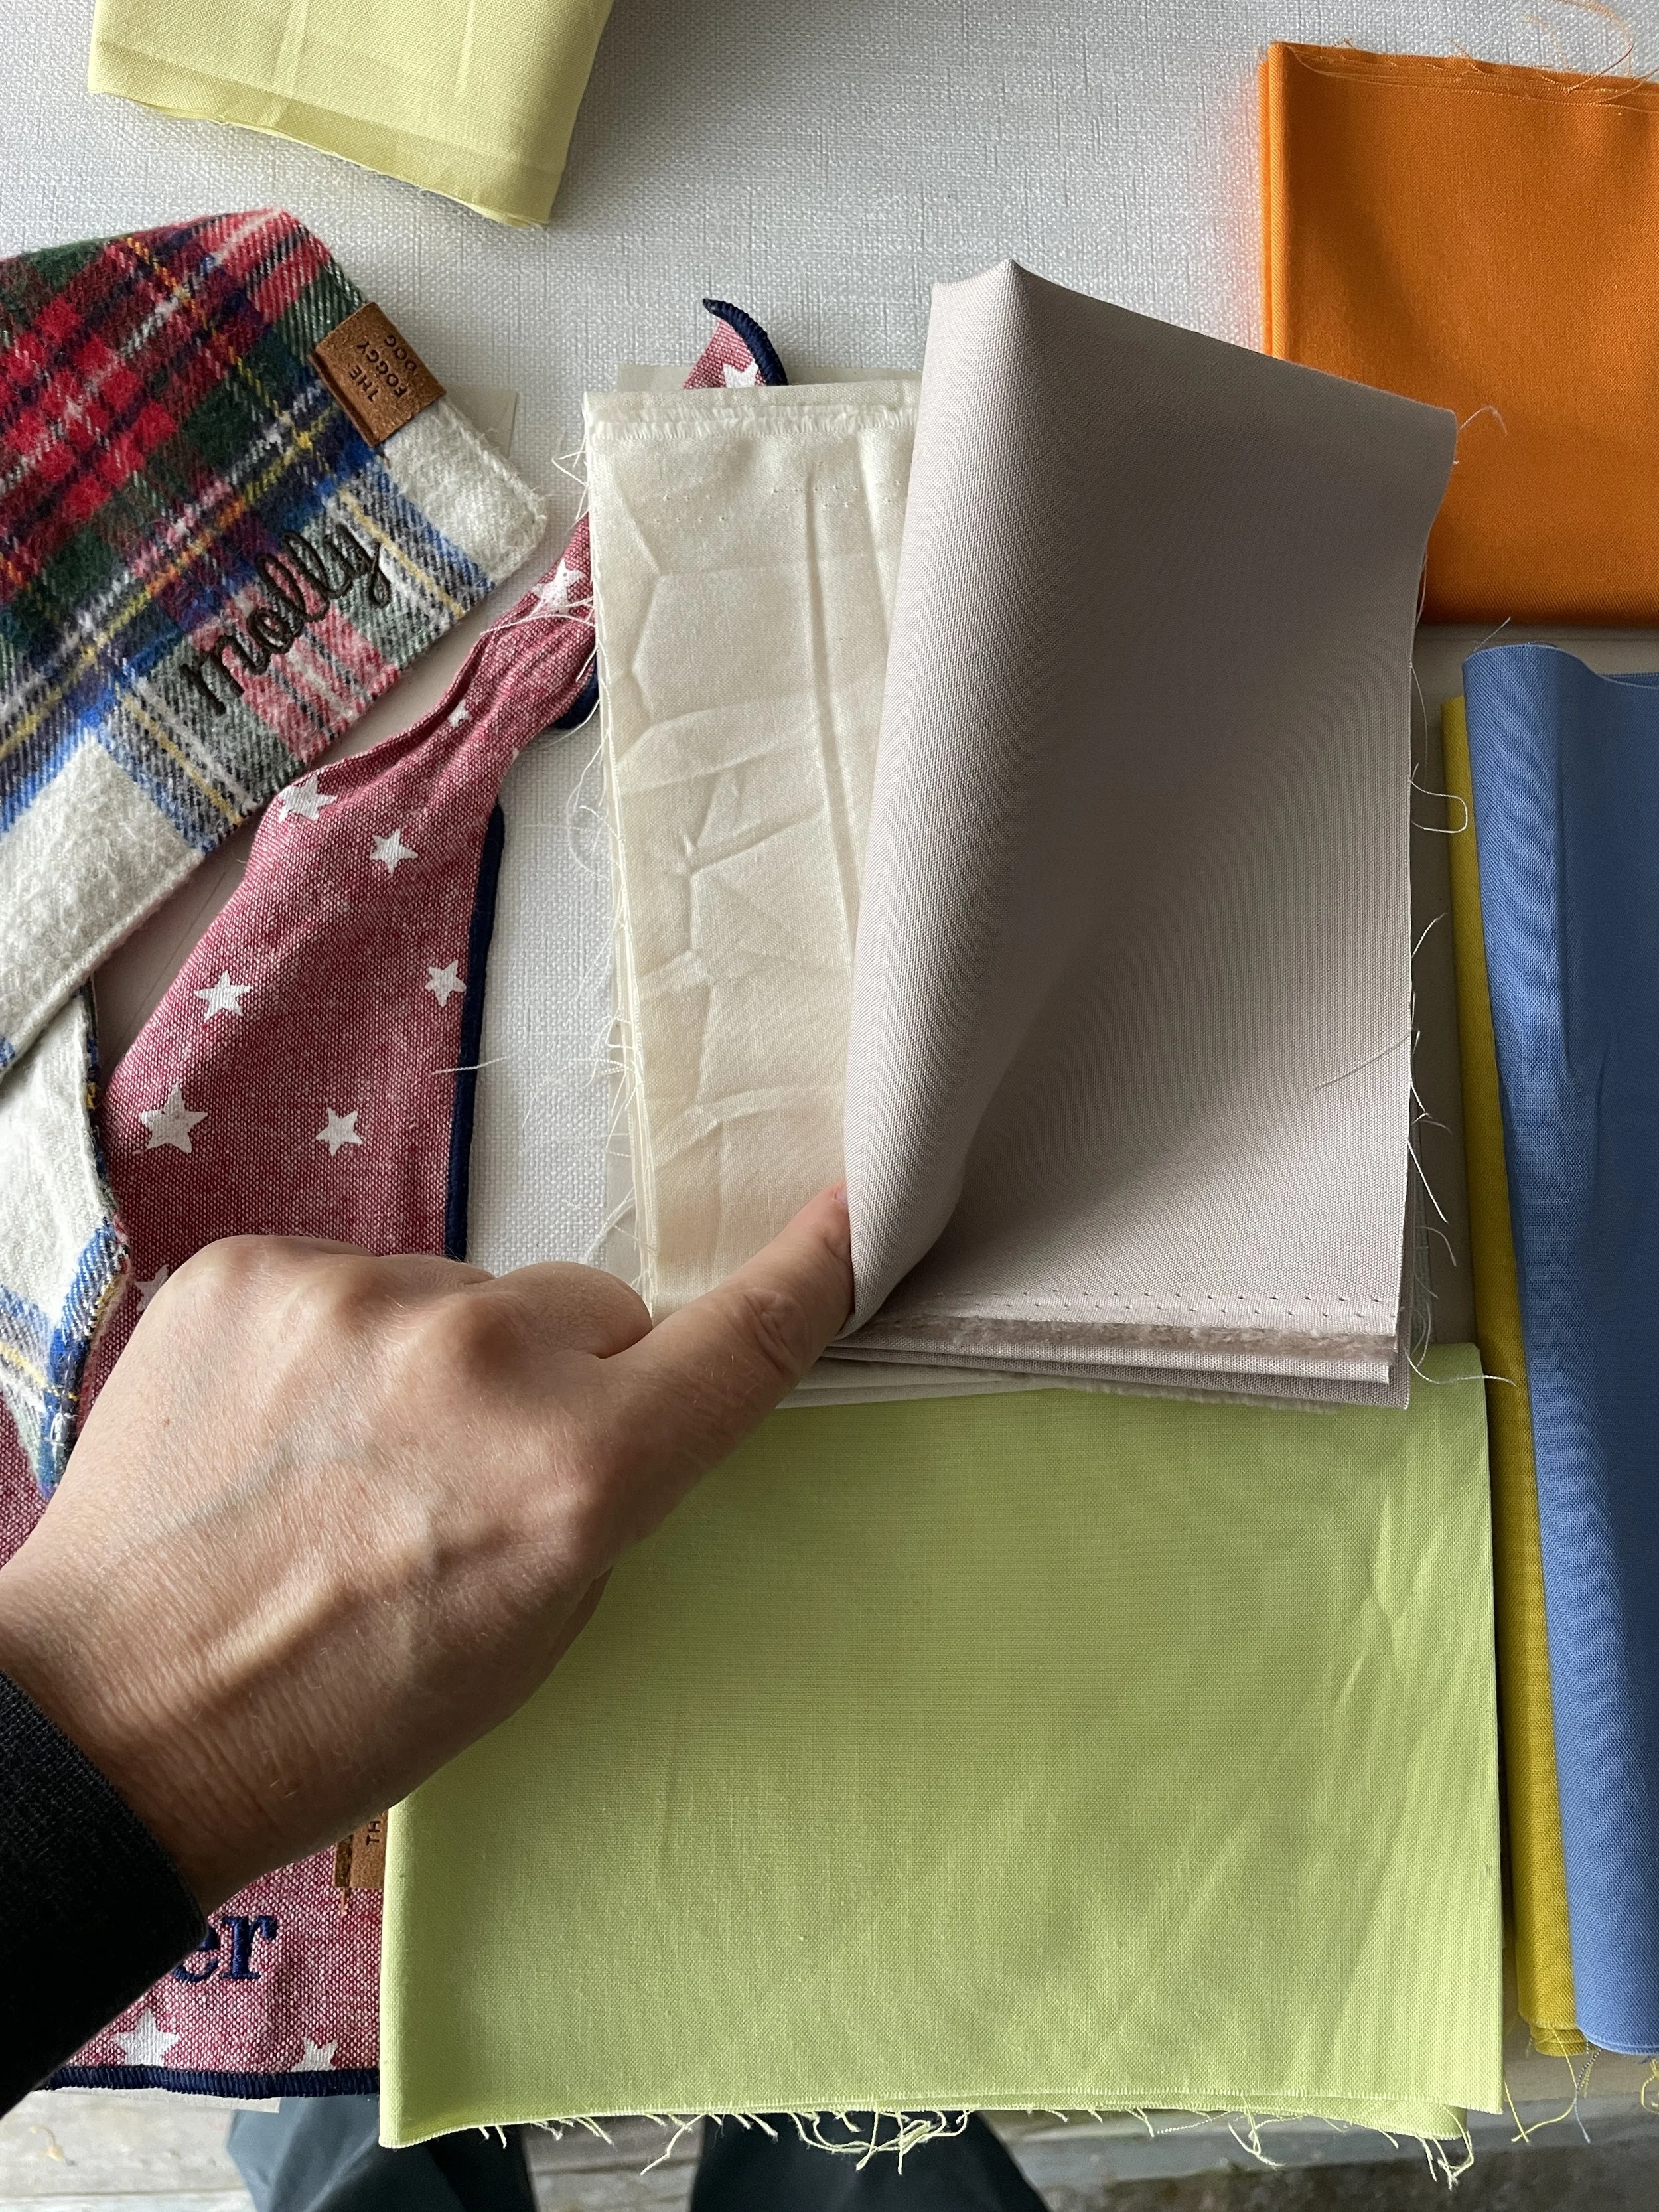
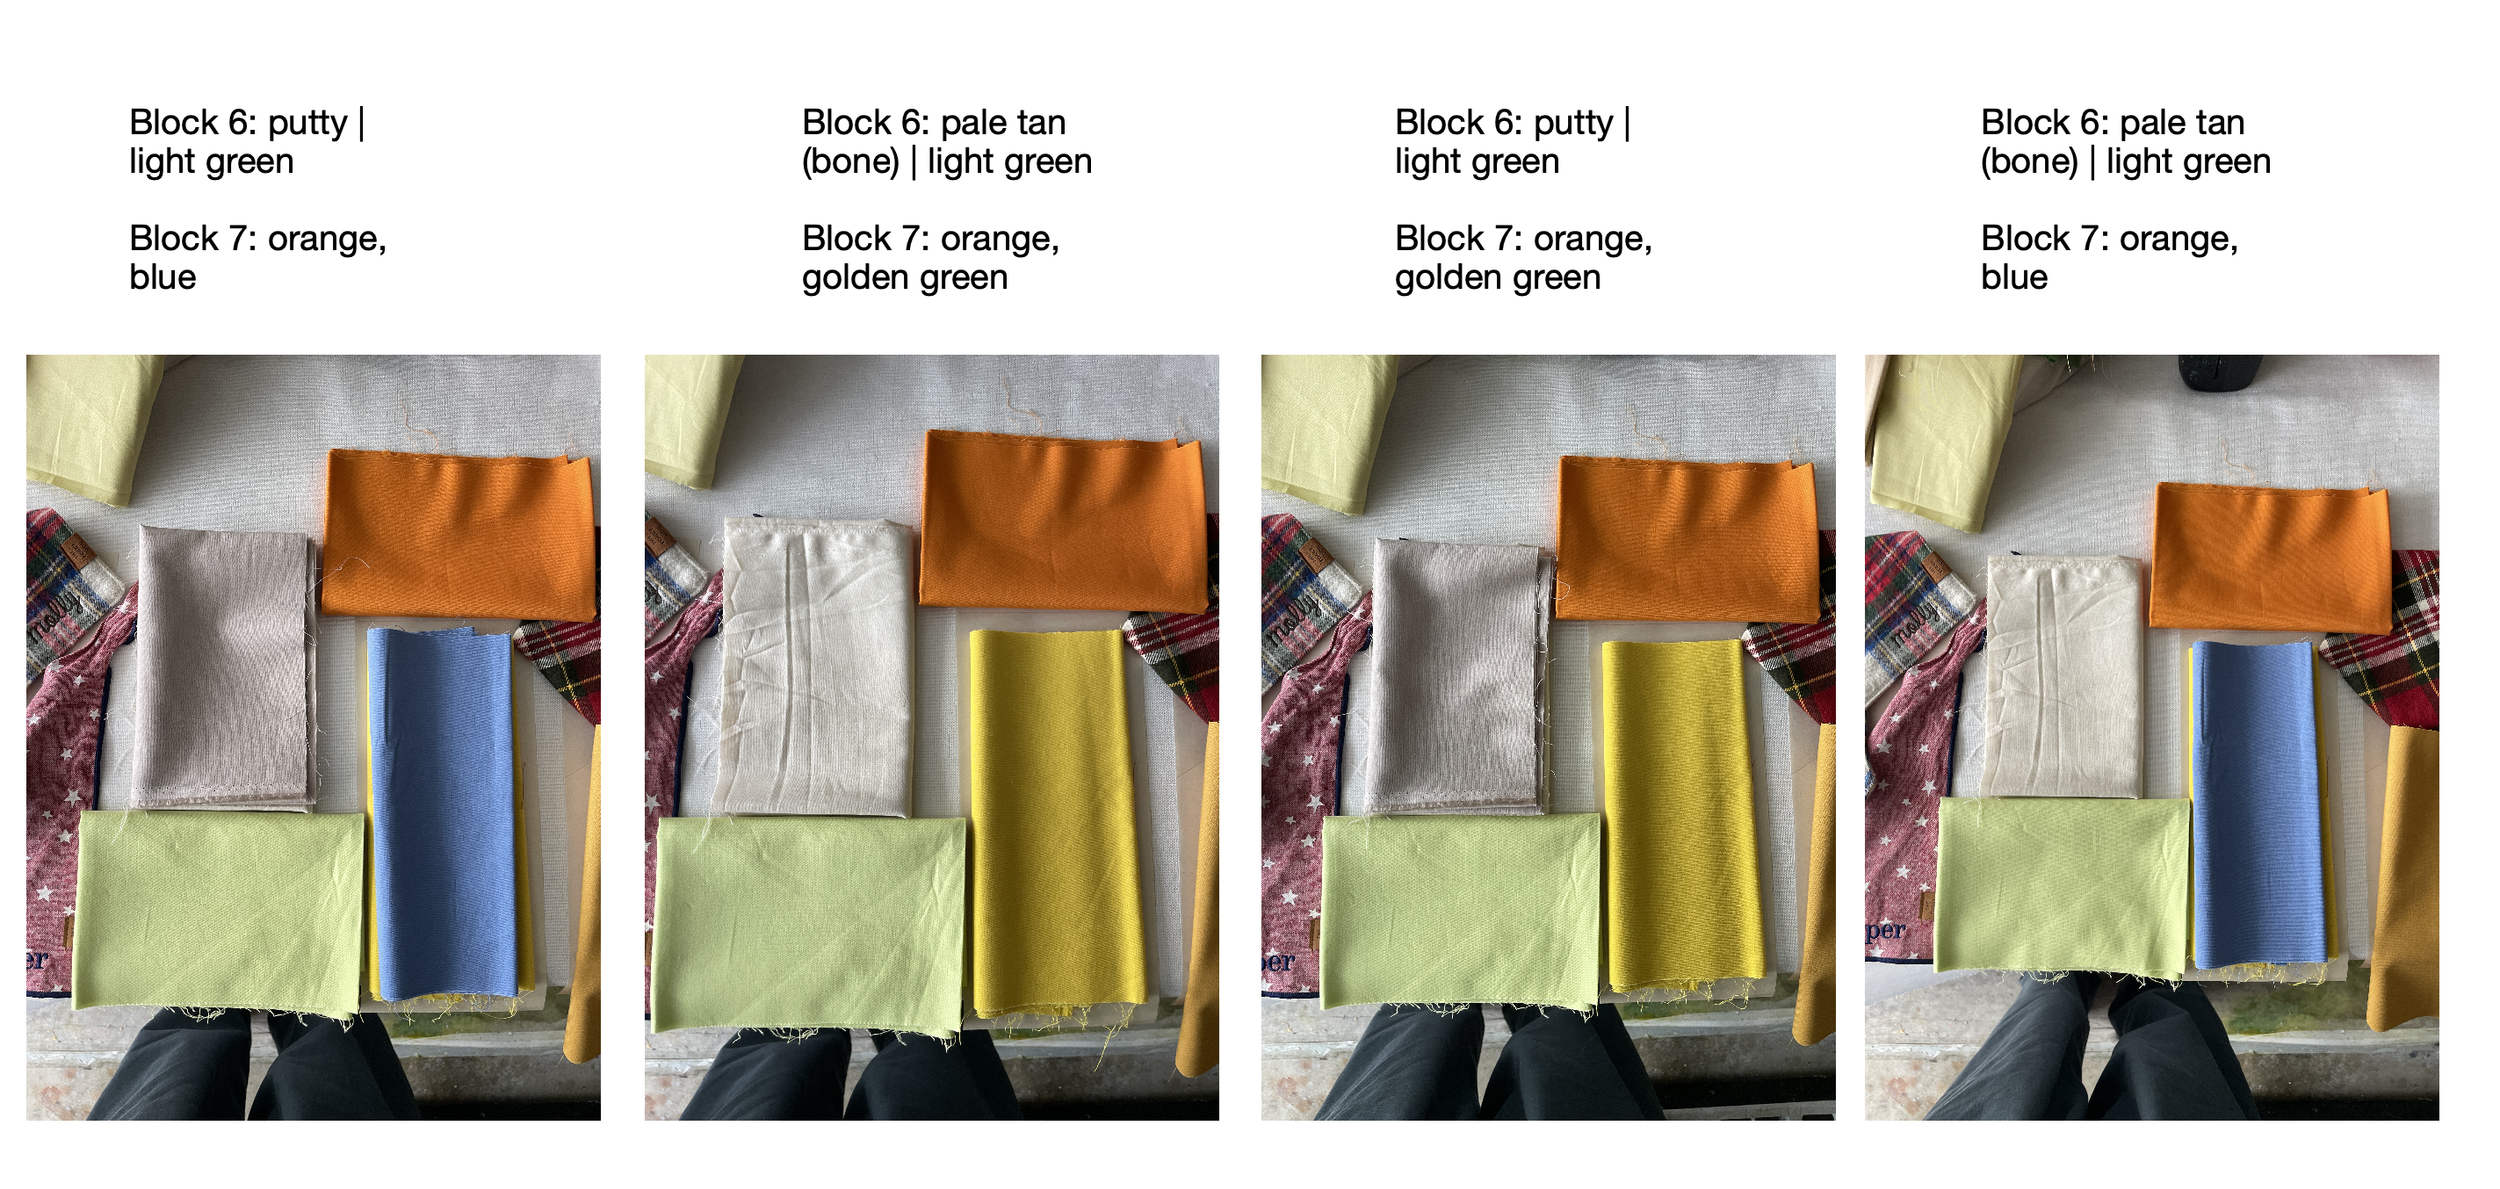
It’s incredible that we can buy and dye fabrics to be any and every color and shade we want. And yet, choosing from an entire world of color can be overwhelming. After selecting the bandanas that would be used in the quilt, we needed eleven complimentary colors to complete the rectangular design. How to choose eleven when our options are limitless? I’m sure this design could be remixed a thousand times over beautifully.
With the hero bandanas in hand, and a couple hundred shades of solid cotton at the ready, I arranged fabrics atop paper templates (cut to scale) and documented my favorites.


I absolutely adore how hands-on Karen was throughout the design process. When I offered her a virtual mix and match fabric session so that she too could arrange and experiment with pairings, she was game.
One by one we worked our way through fabric stacks, trying anything that looked promising, until we came up with the winning combination.
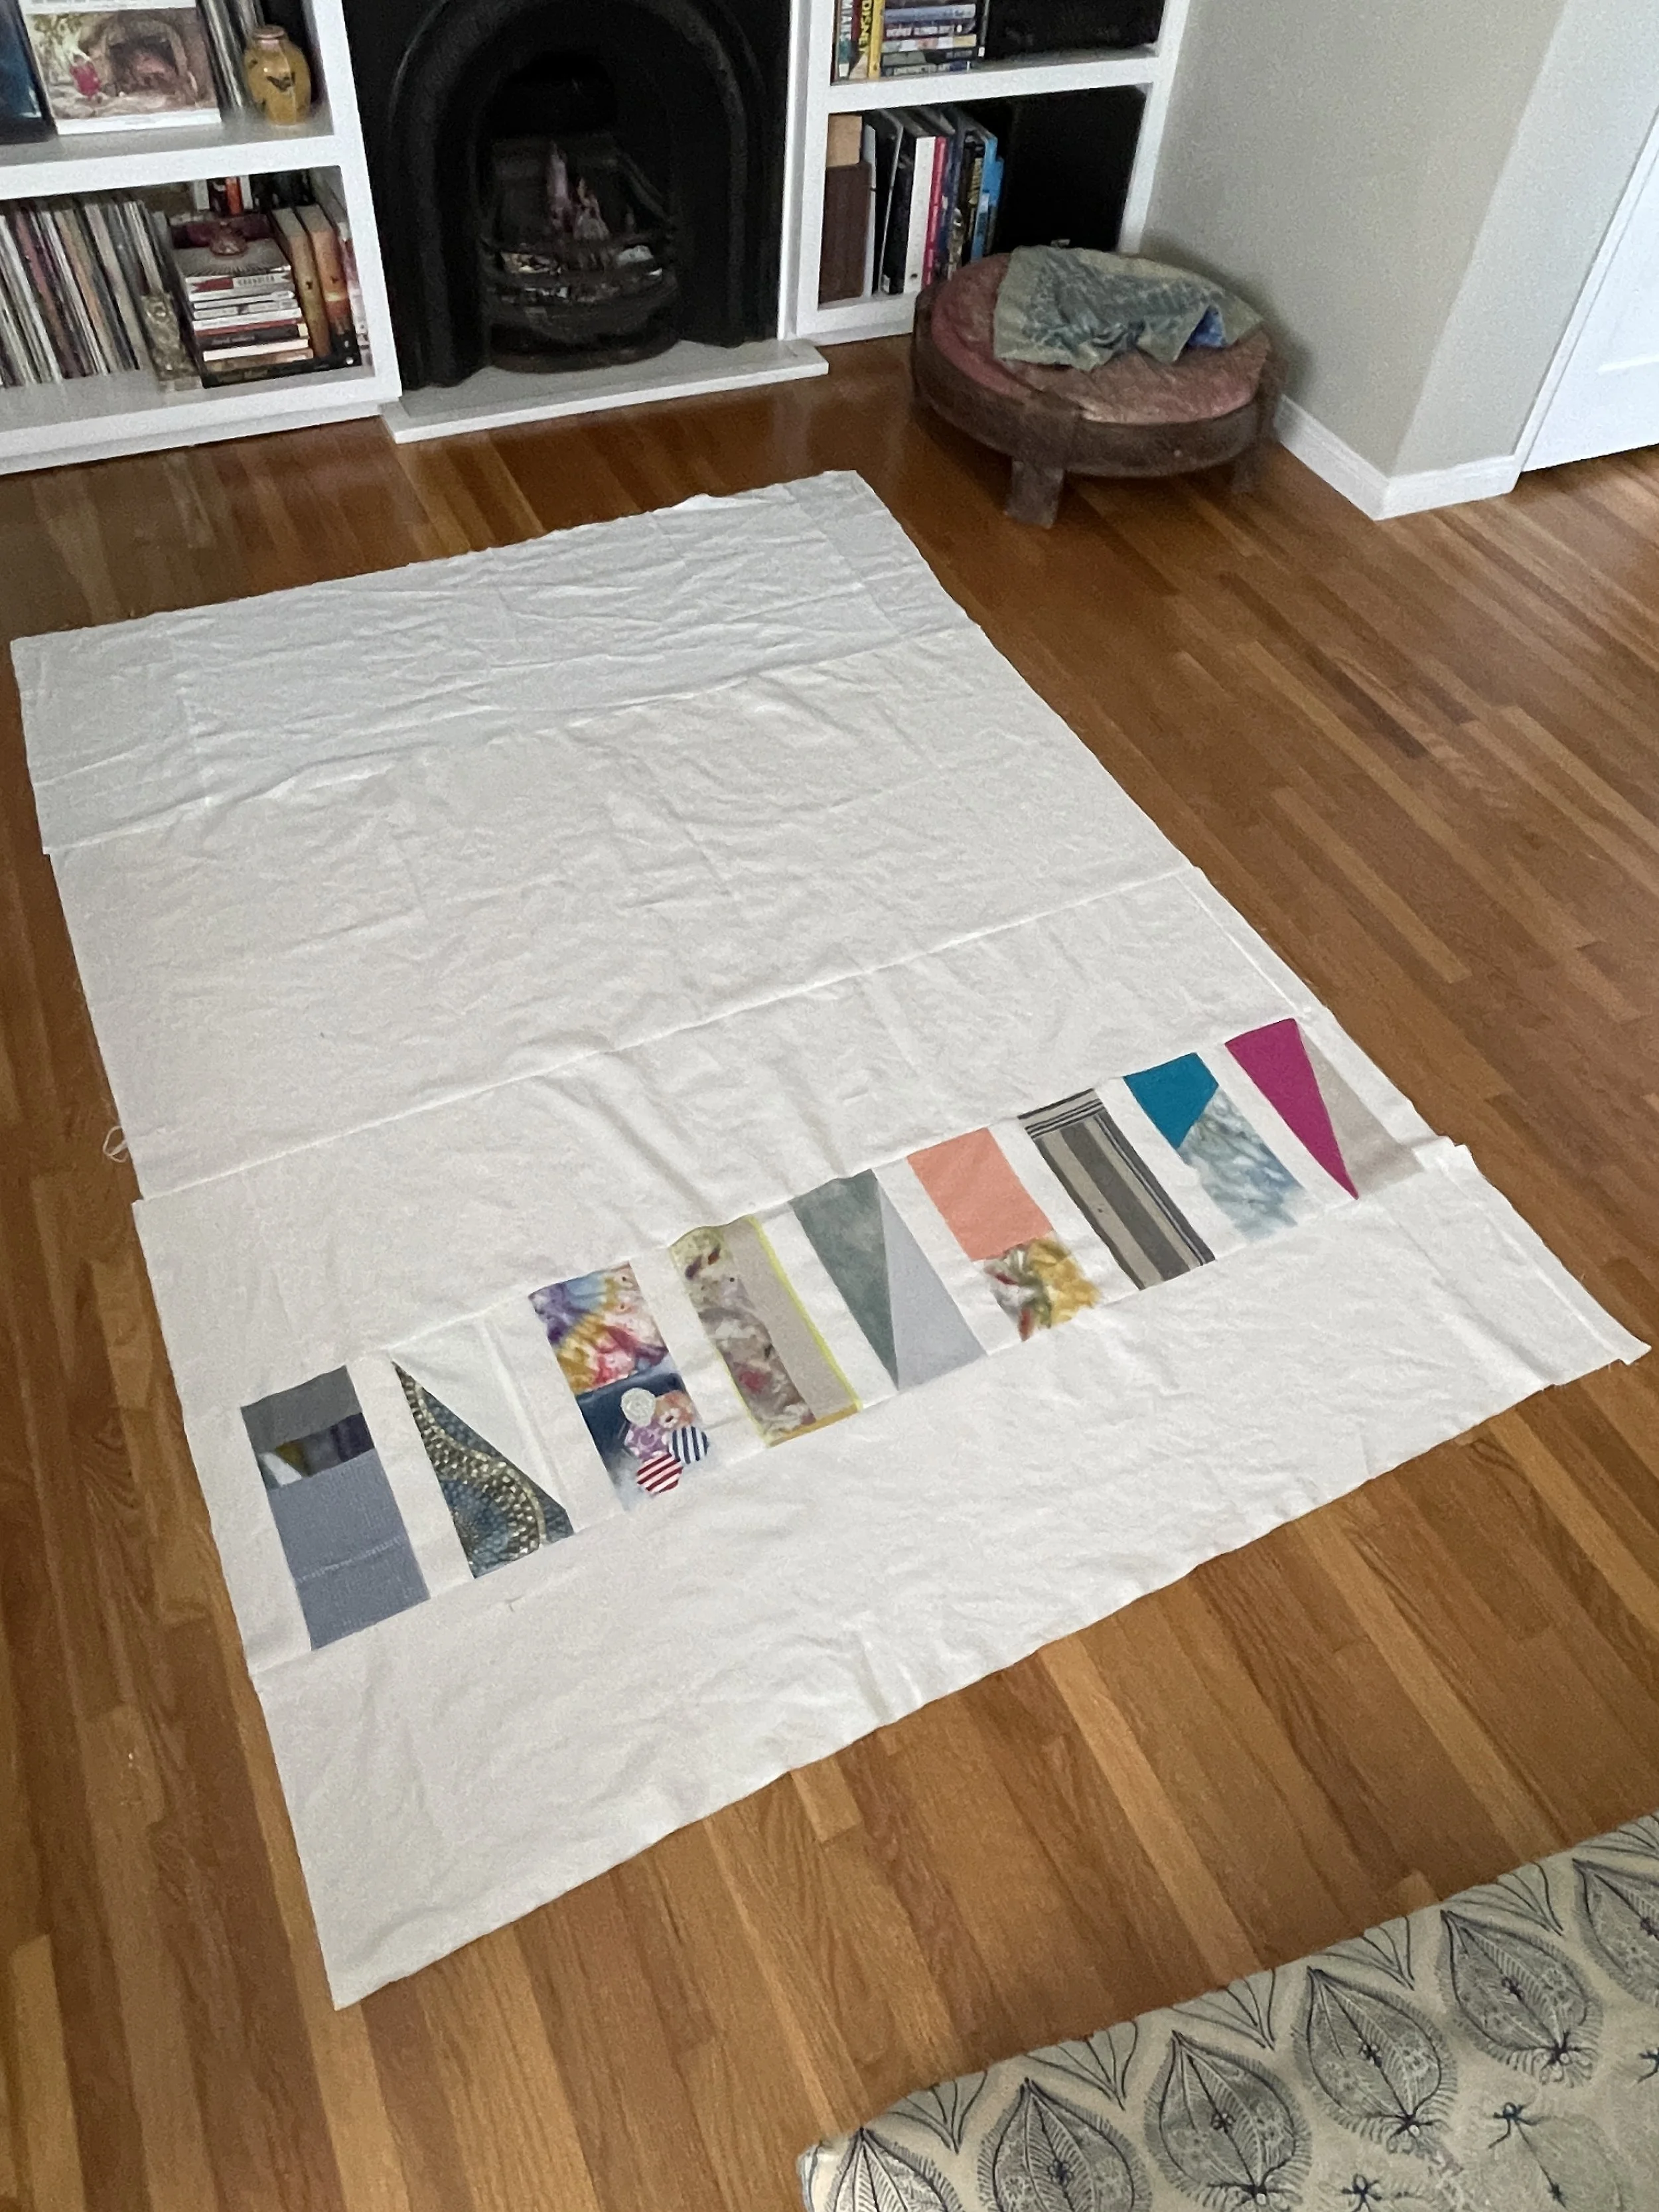
Because I’m me, and because I needed assurance that my calculations were correct before I cut into bandanas… I whipped up a prototype top using studio fabric remnants.
I was pretty pleased, though I did make some minor adjustments for Karen’s design.
I’ll list the prototype in the Shop when complete. The flip side is a large piece of dyed studio dropcloth bordered in white, while this side is comprised of vintage and deadstock cotton and silk.


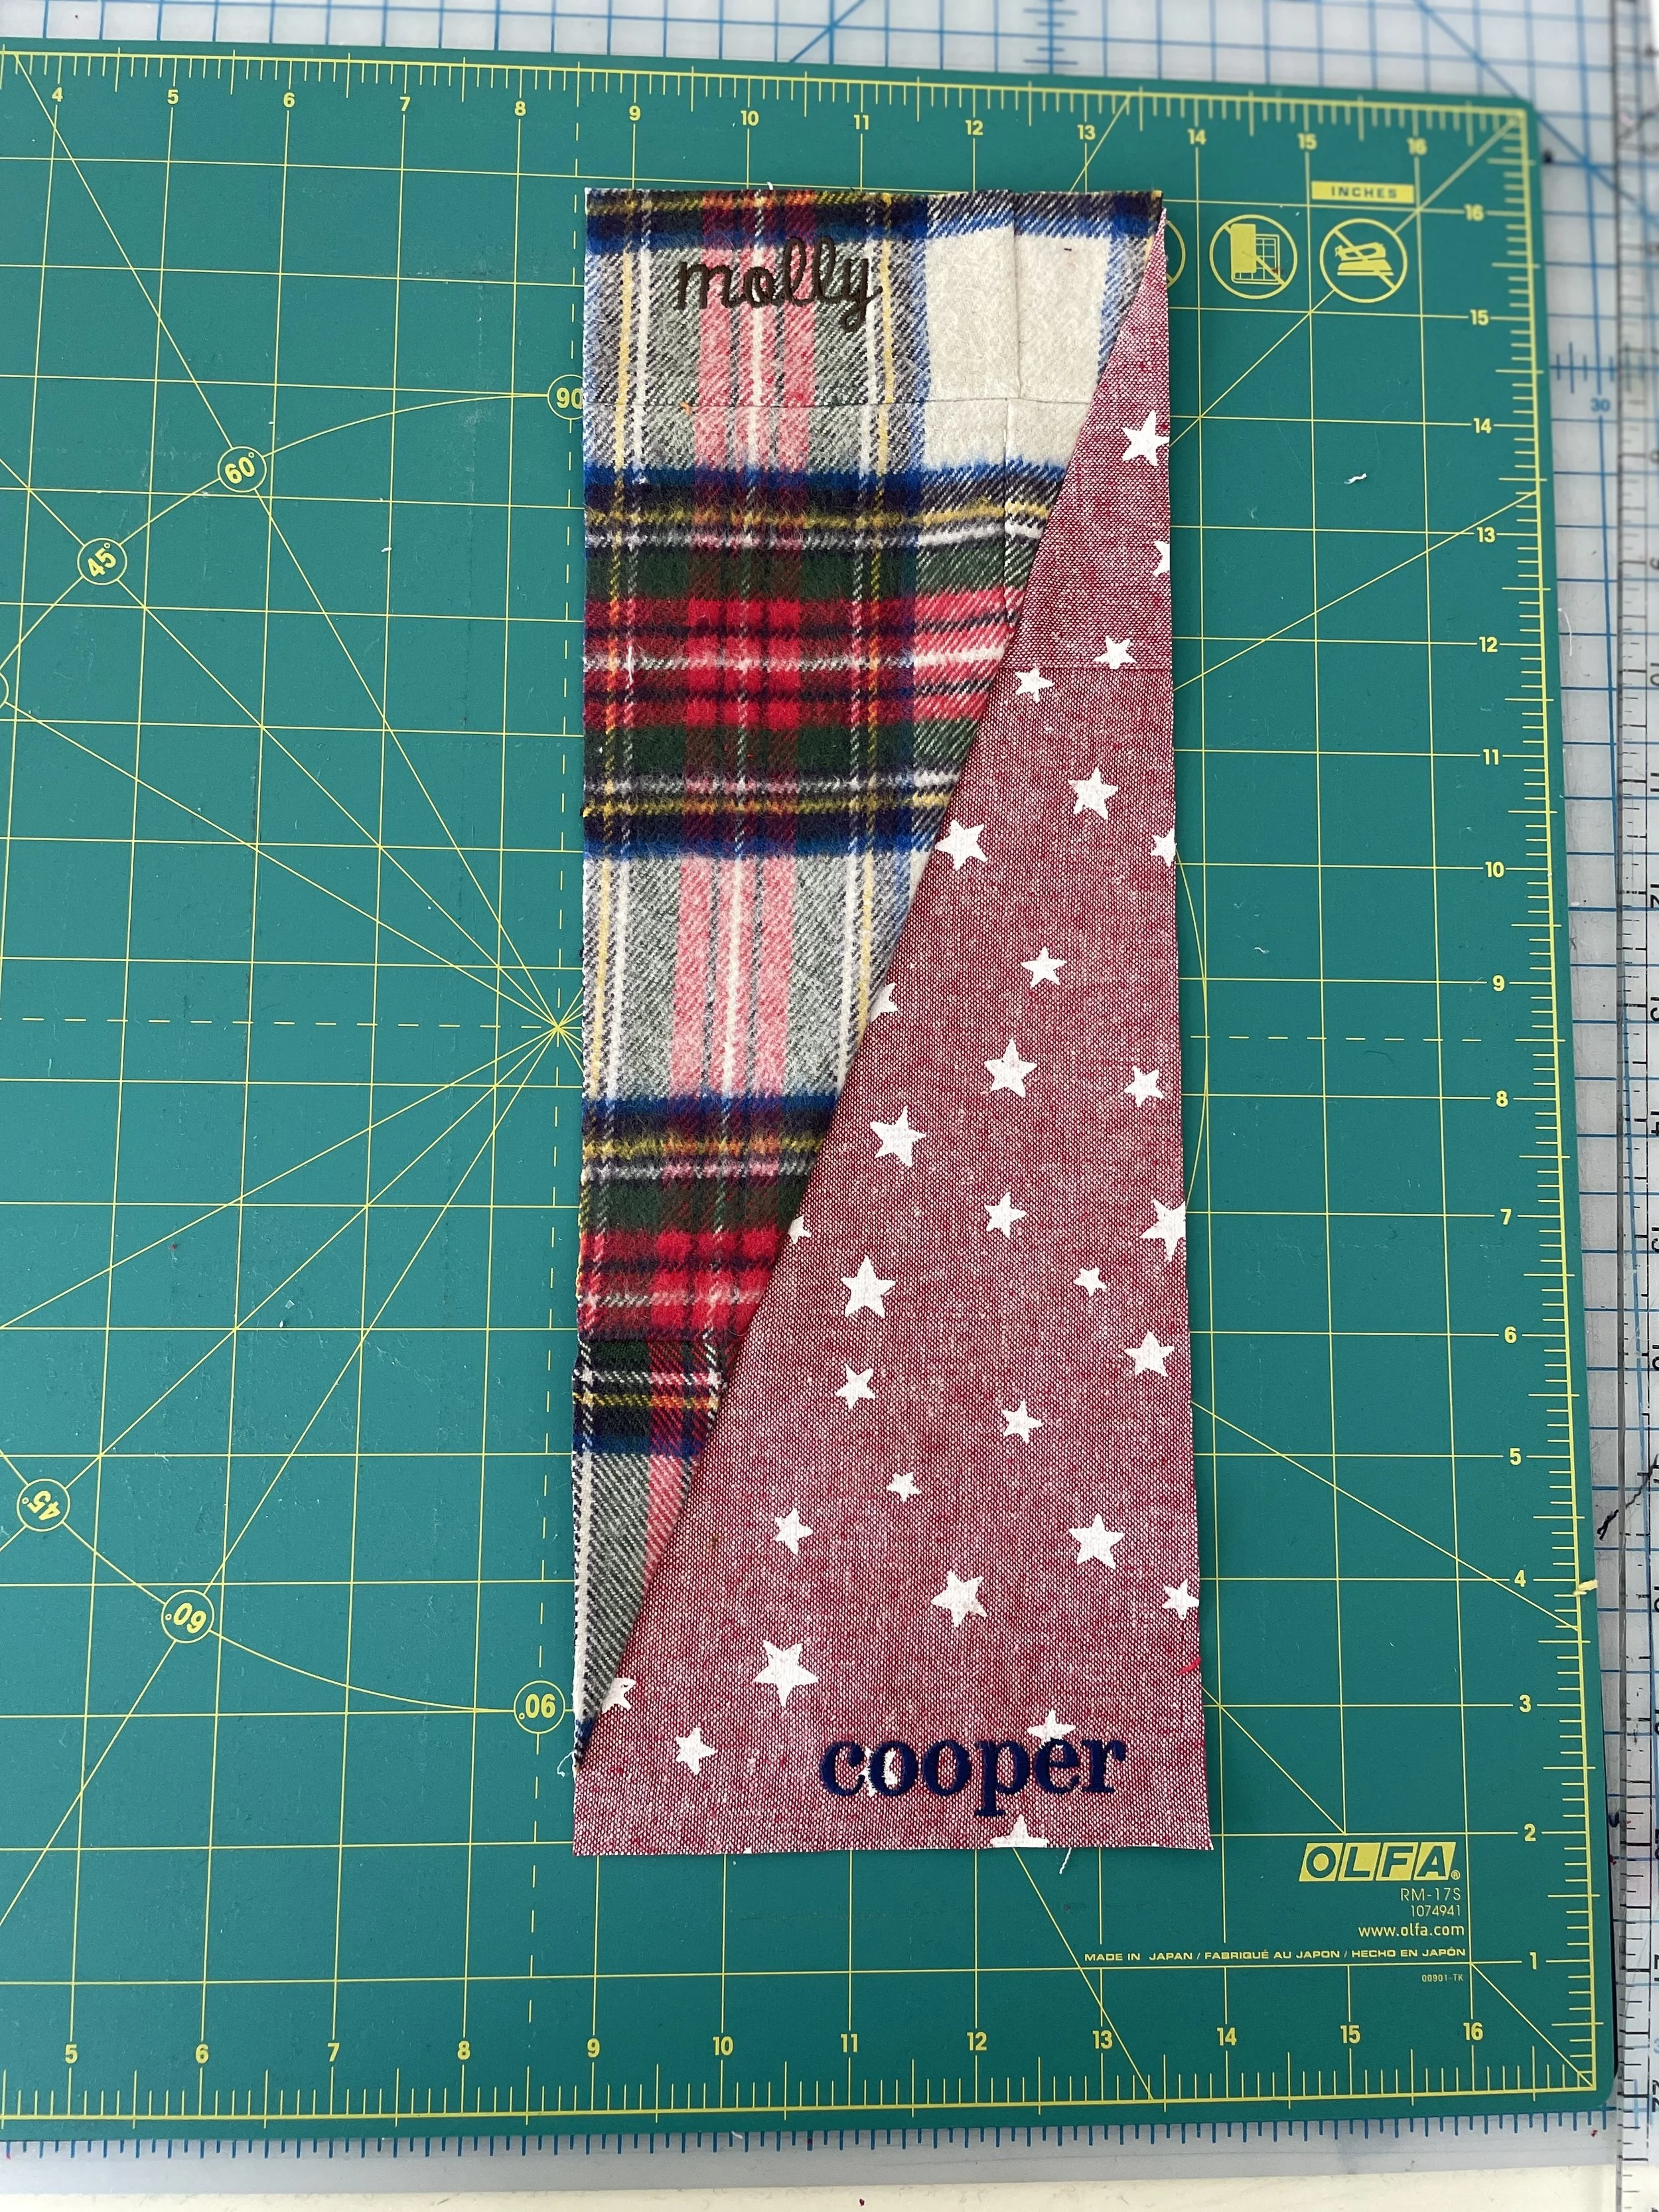
I had two styles of bandanas to work with. Some were larger square pieces (pictured way up above). And some were smaller triangular bandanas (pictured here ↓).
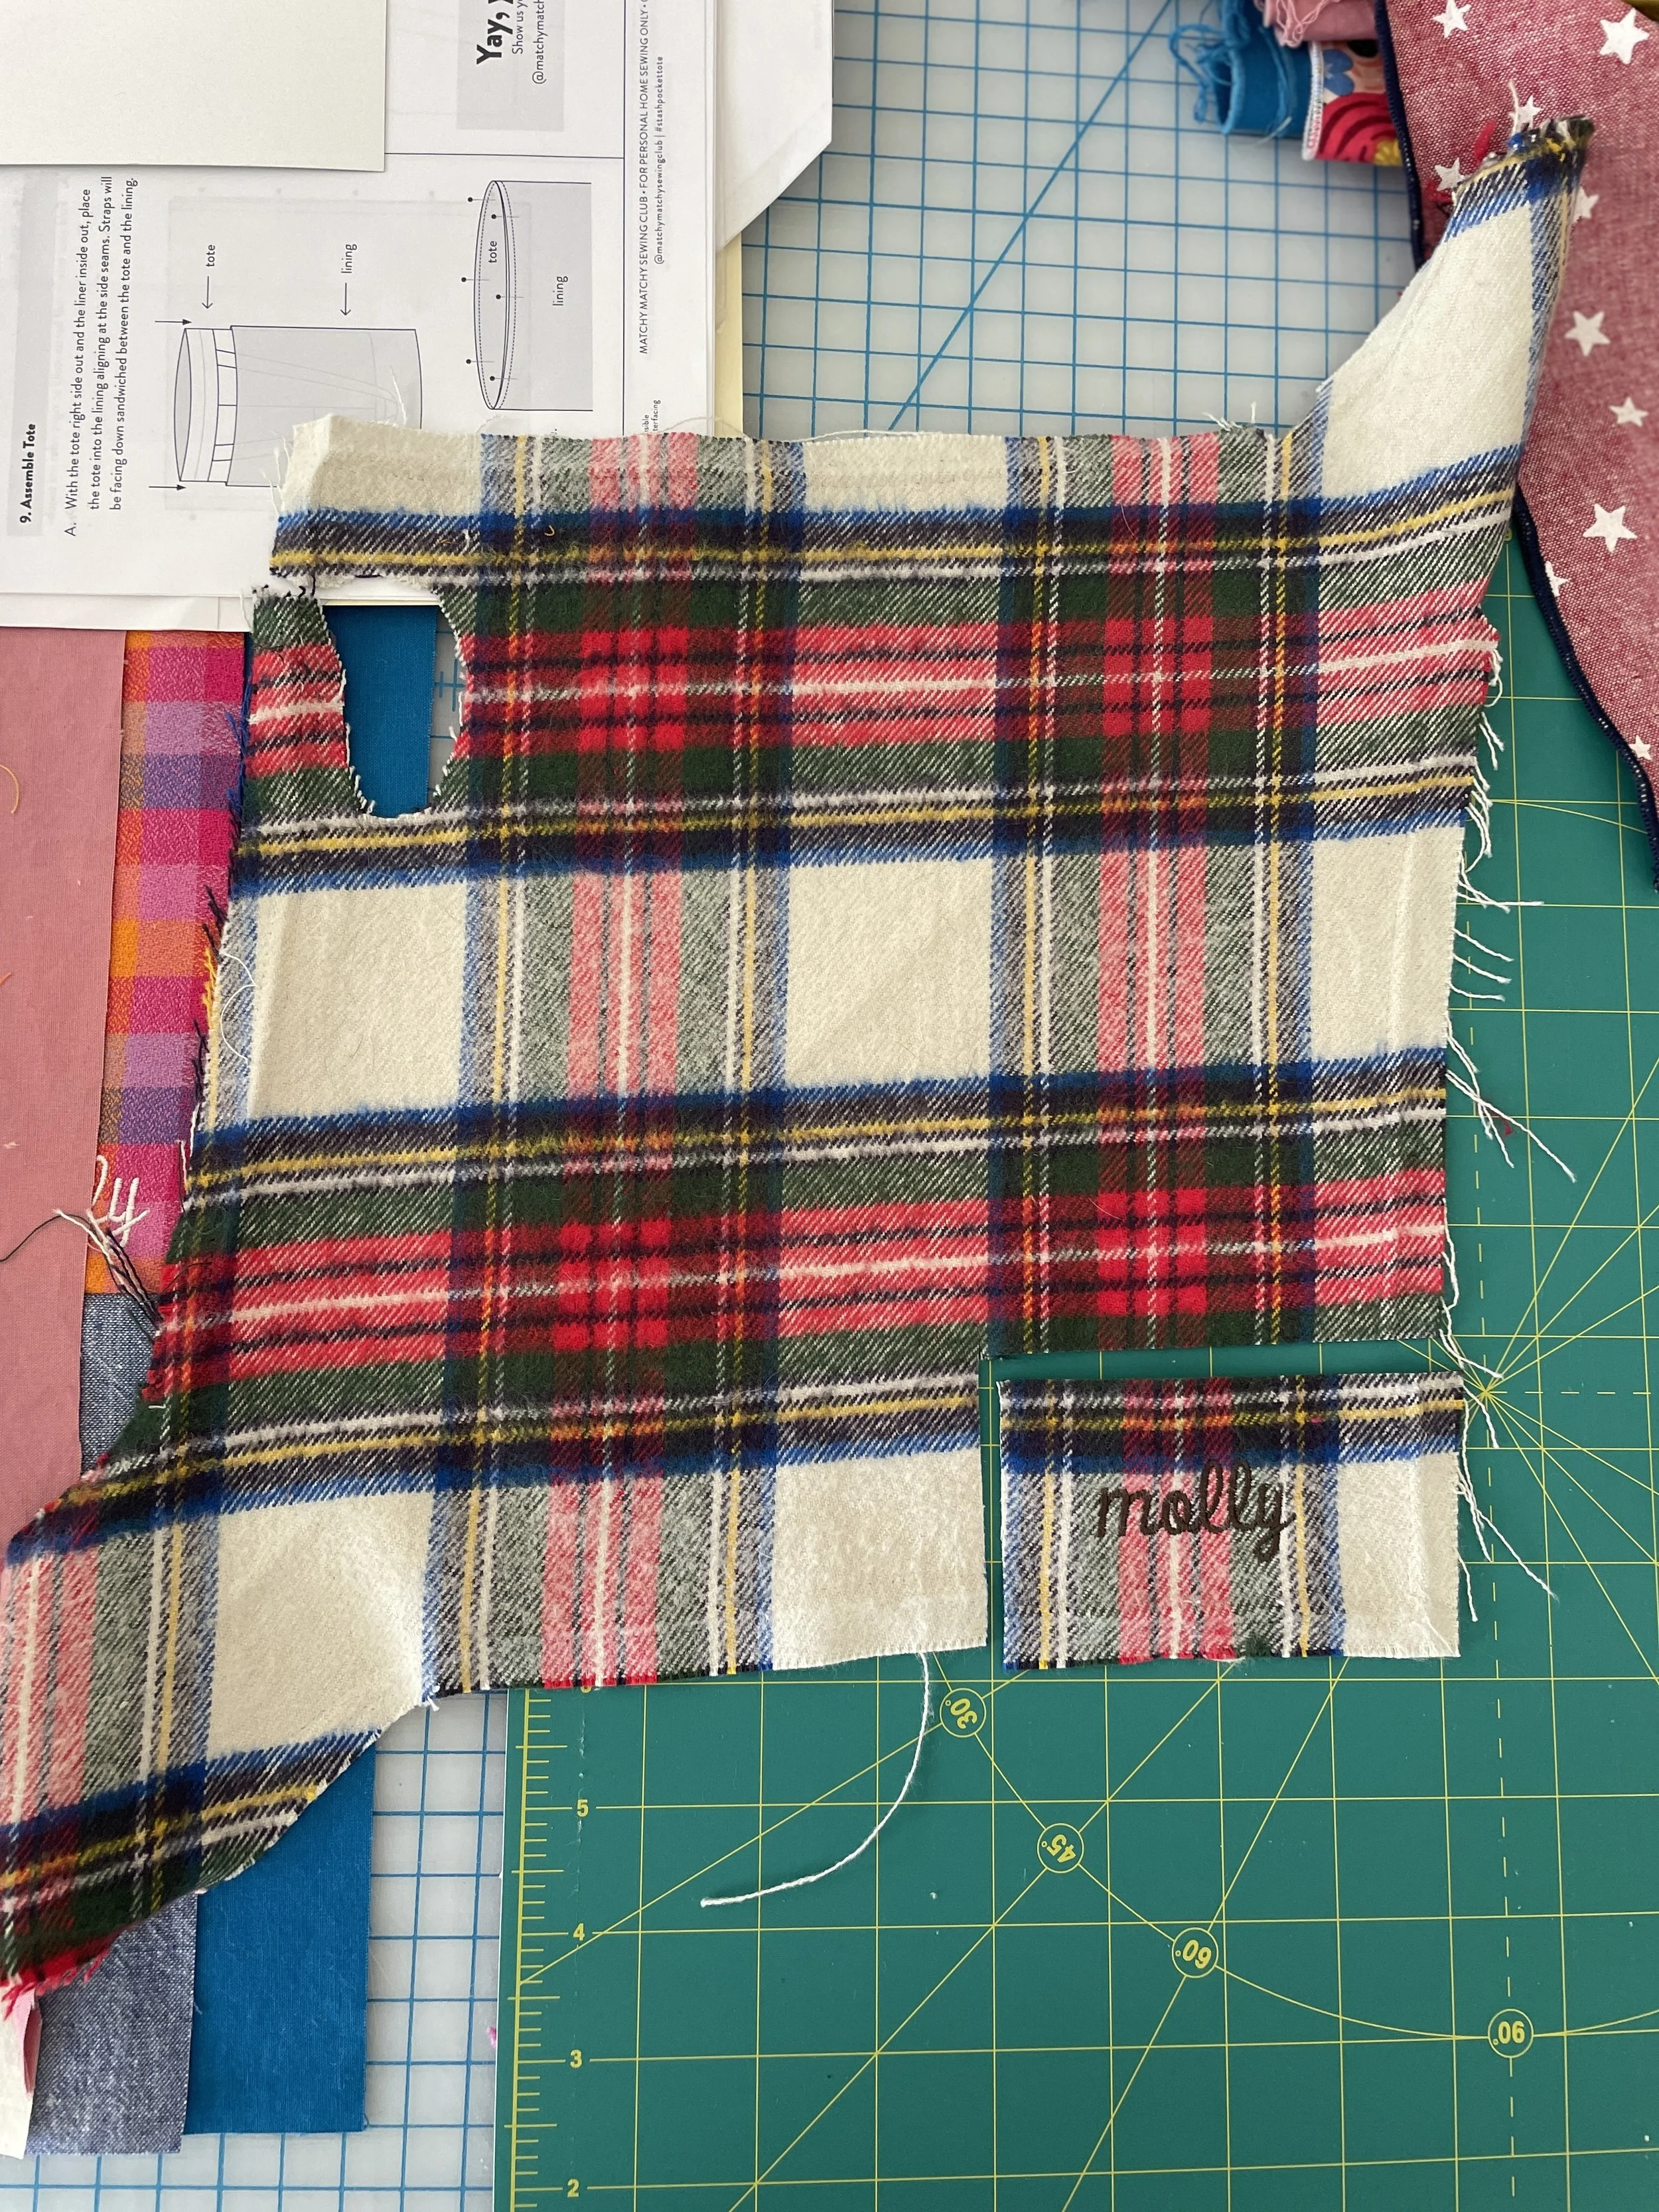
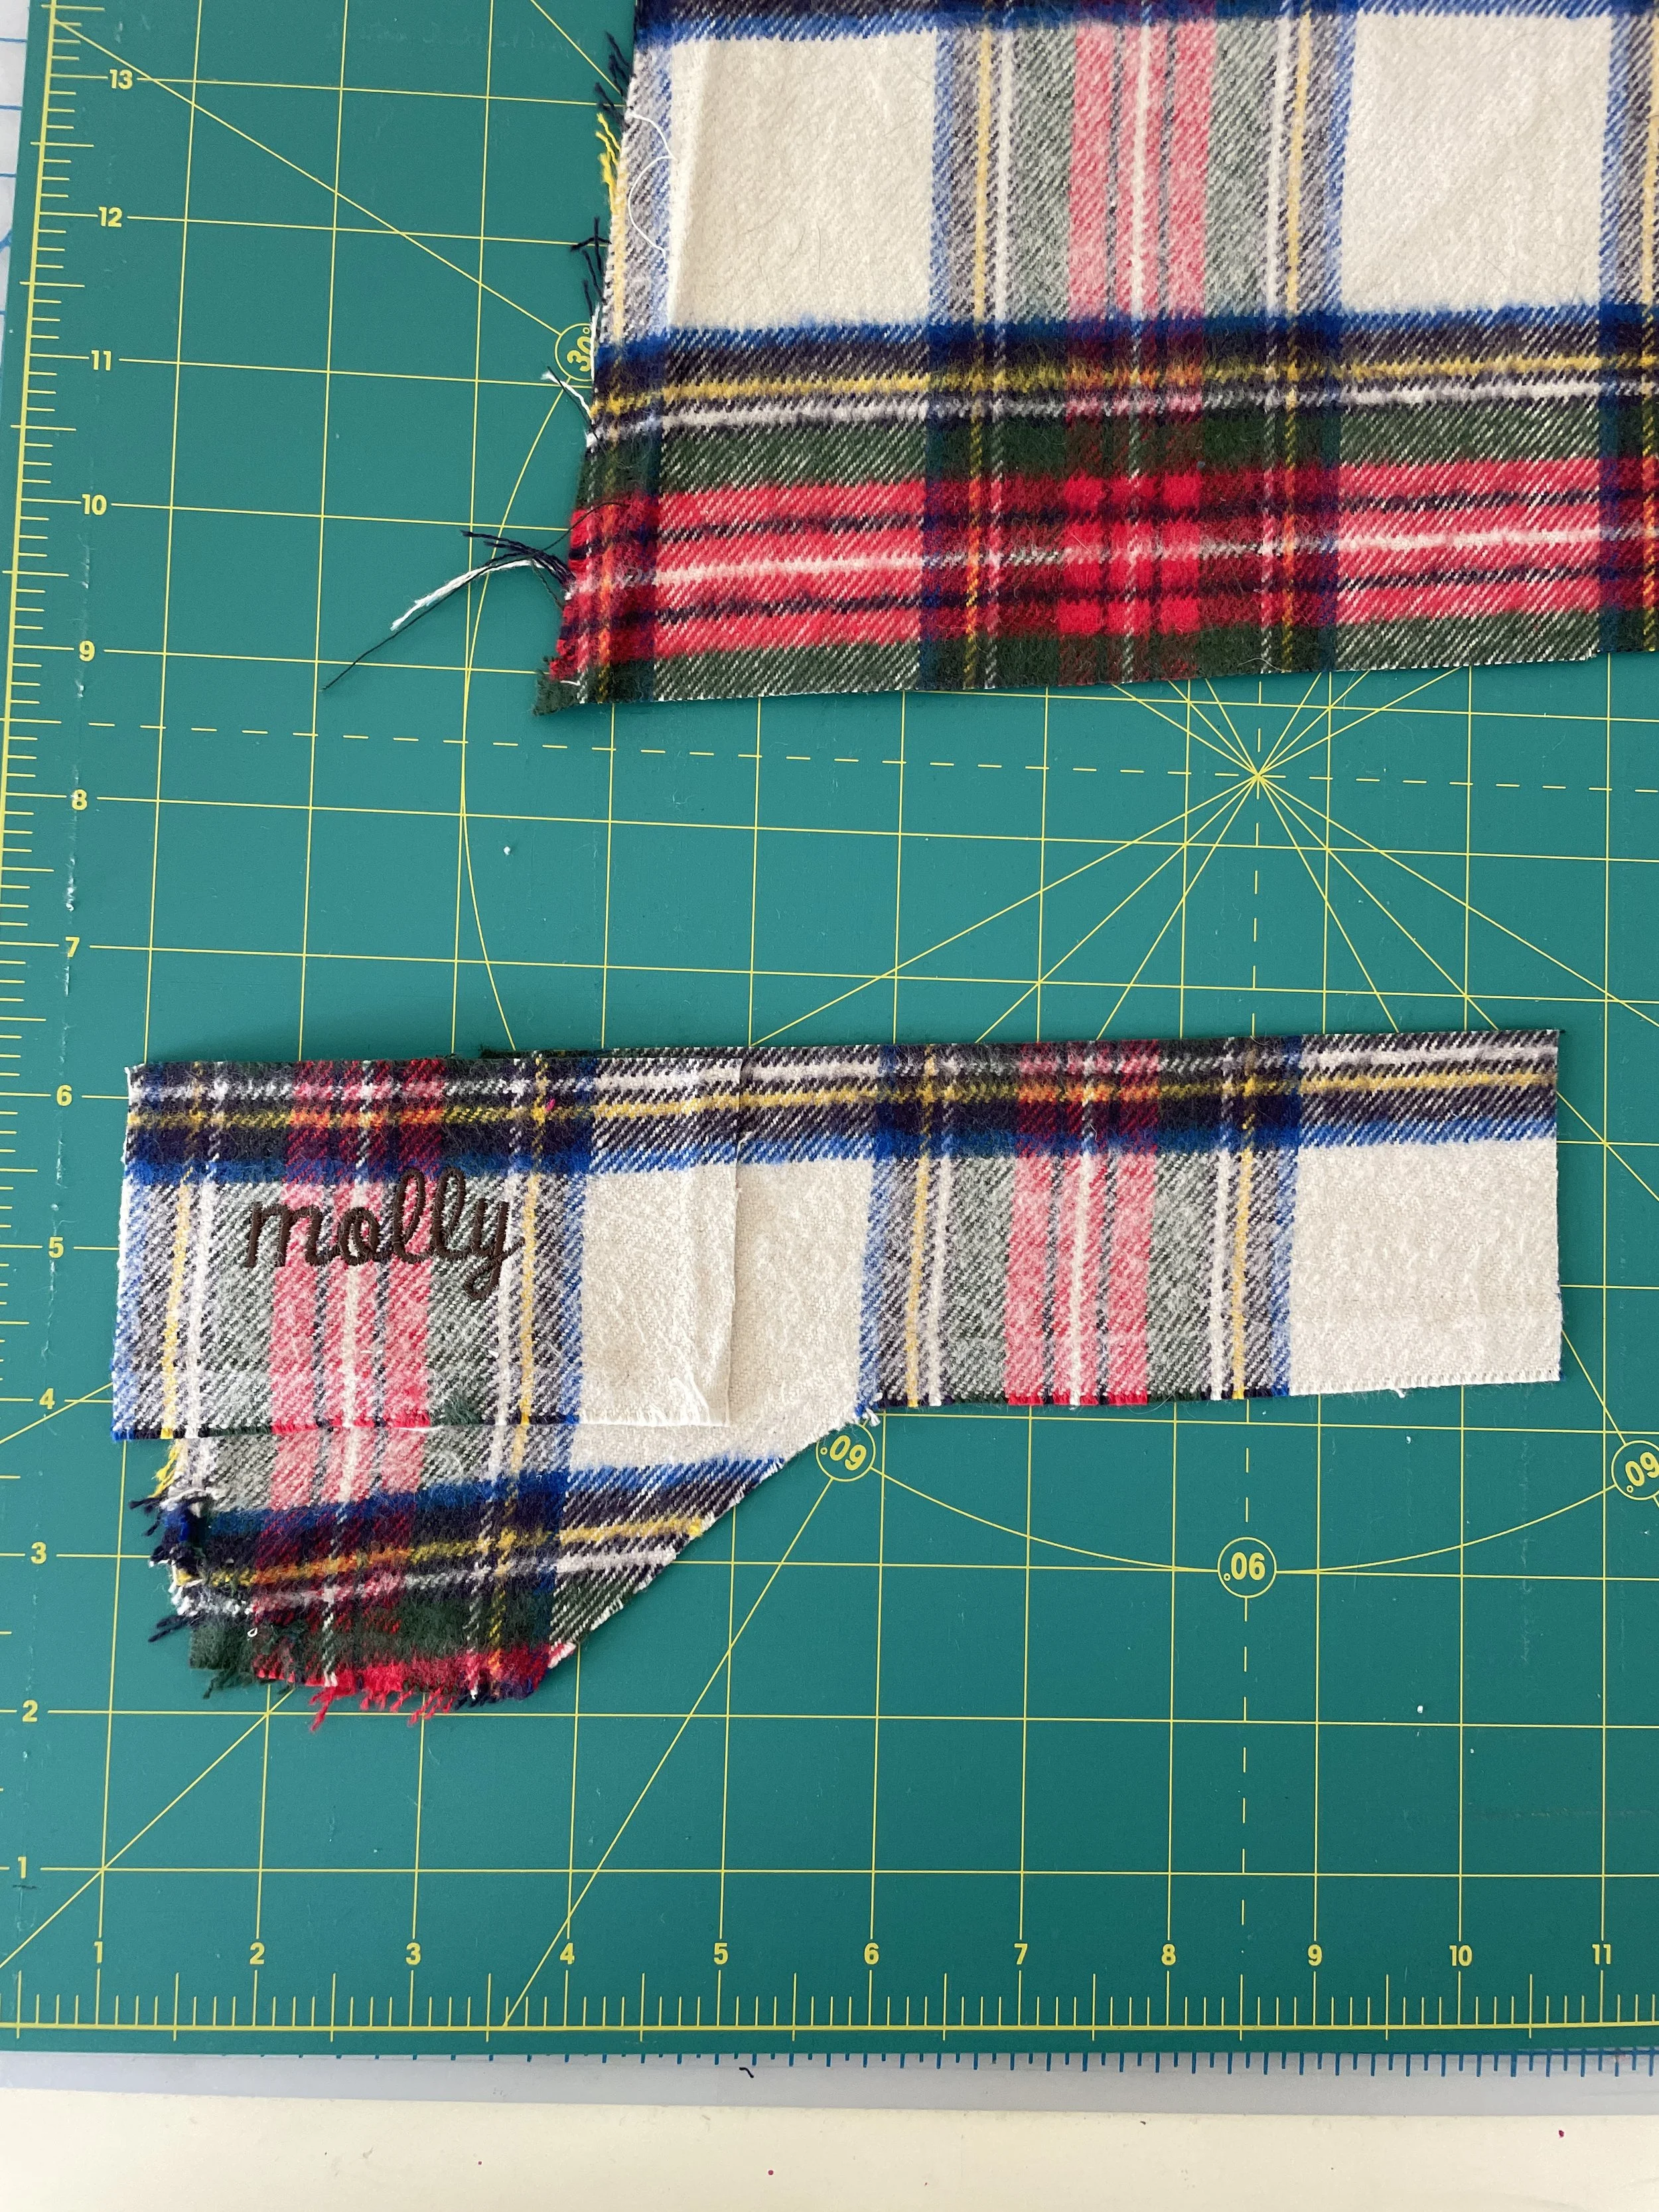
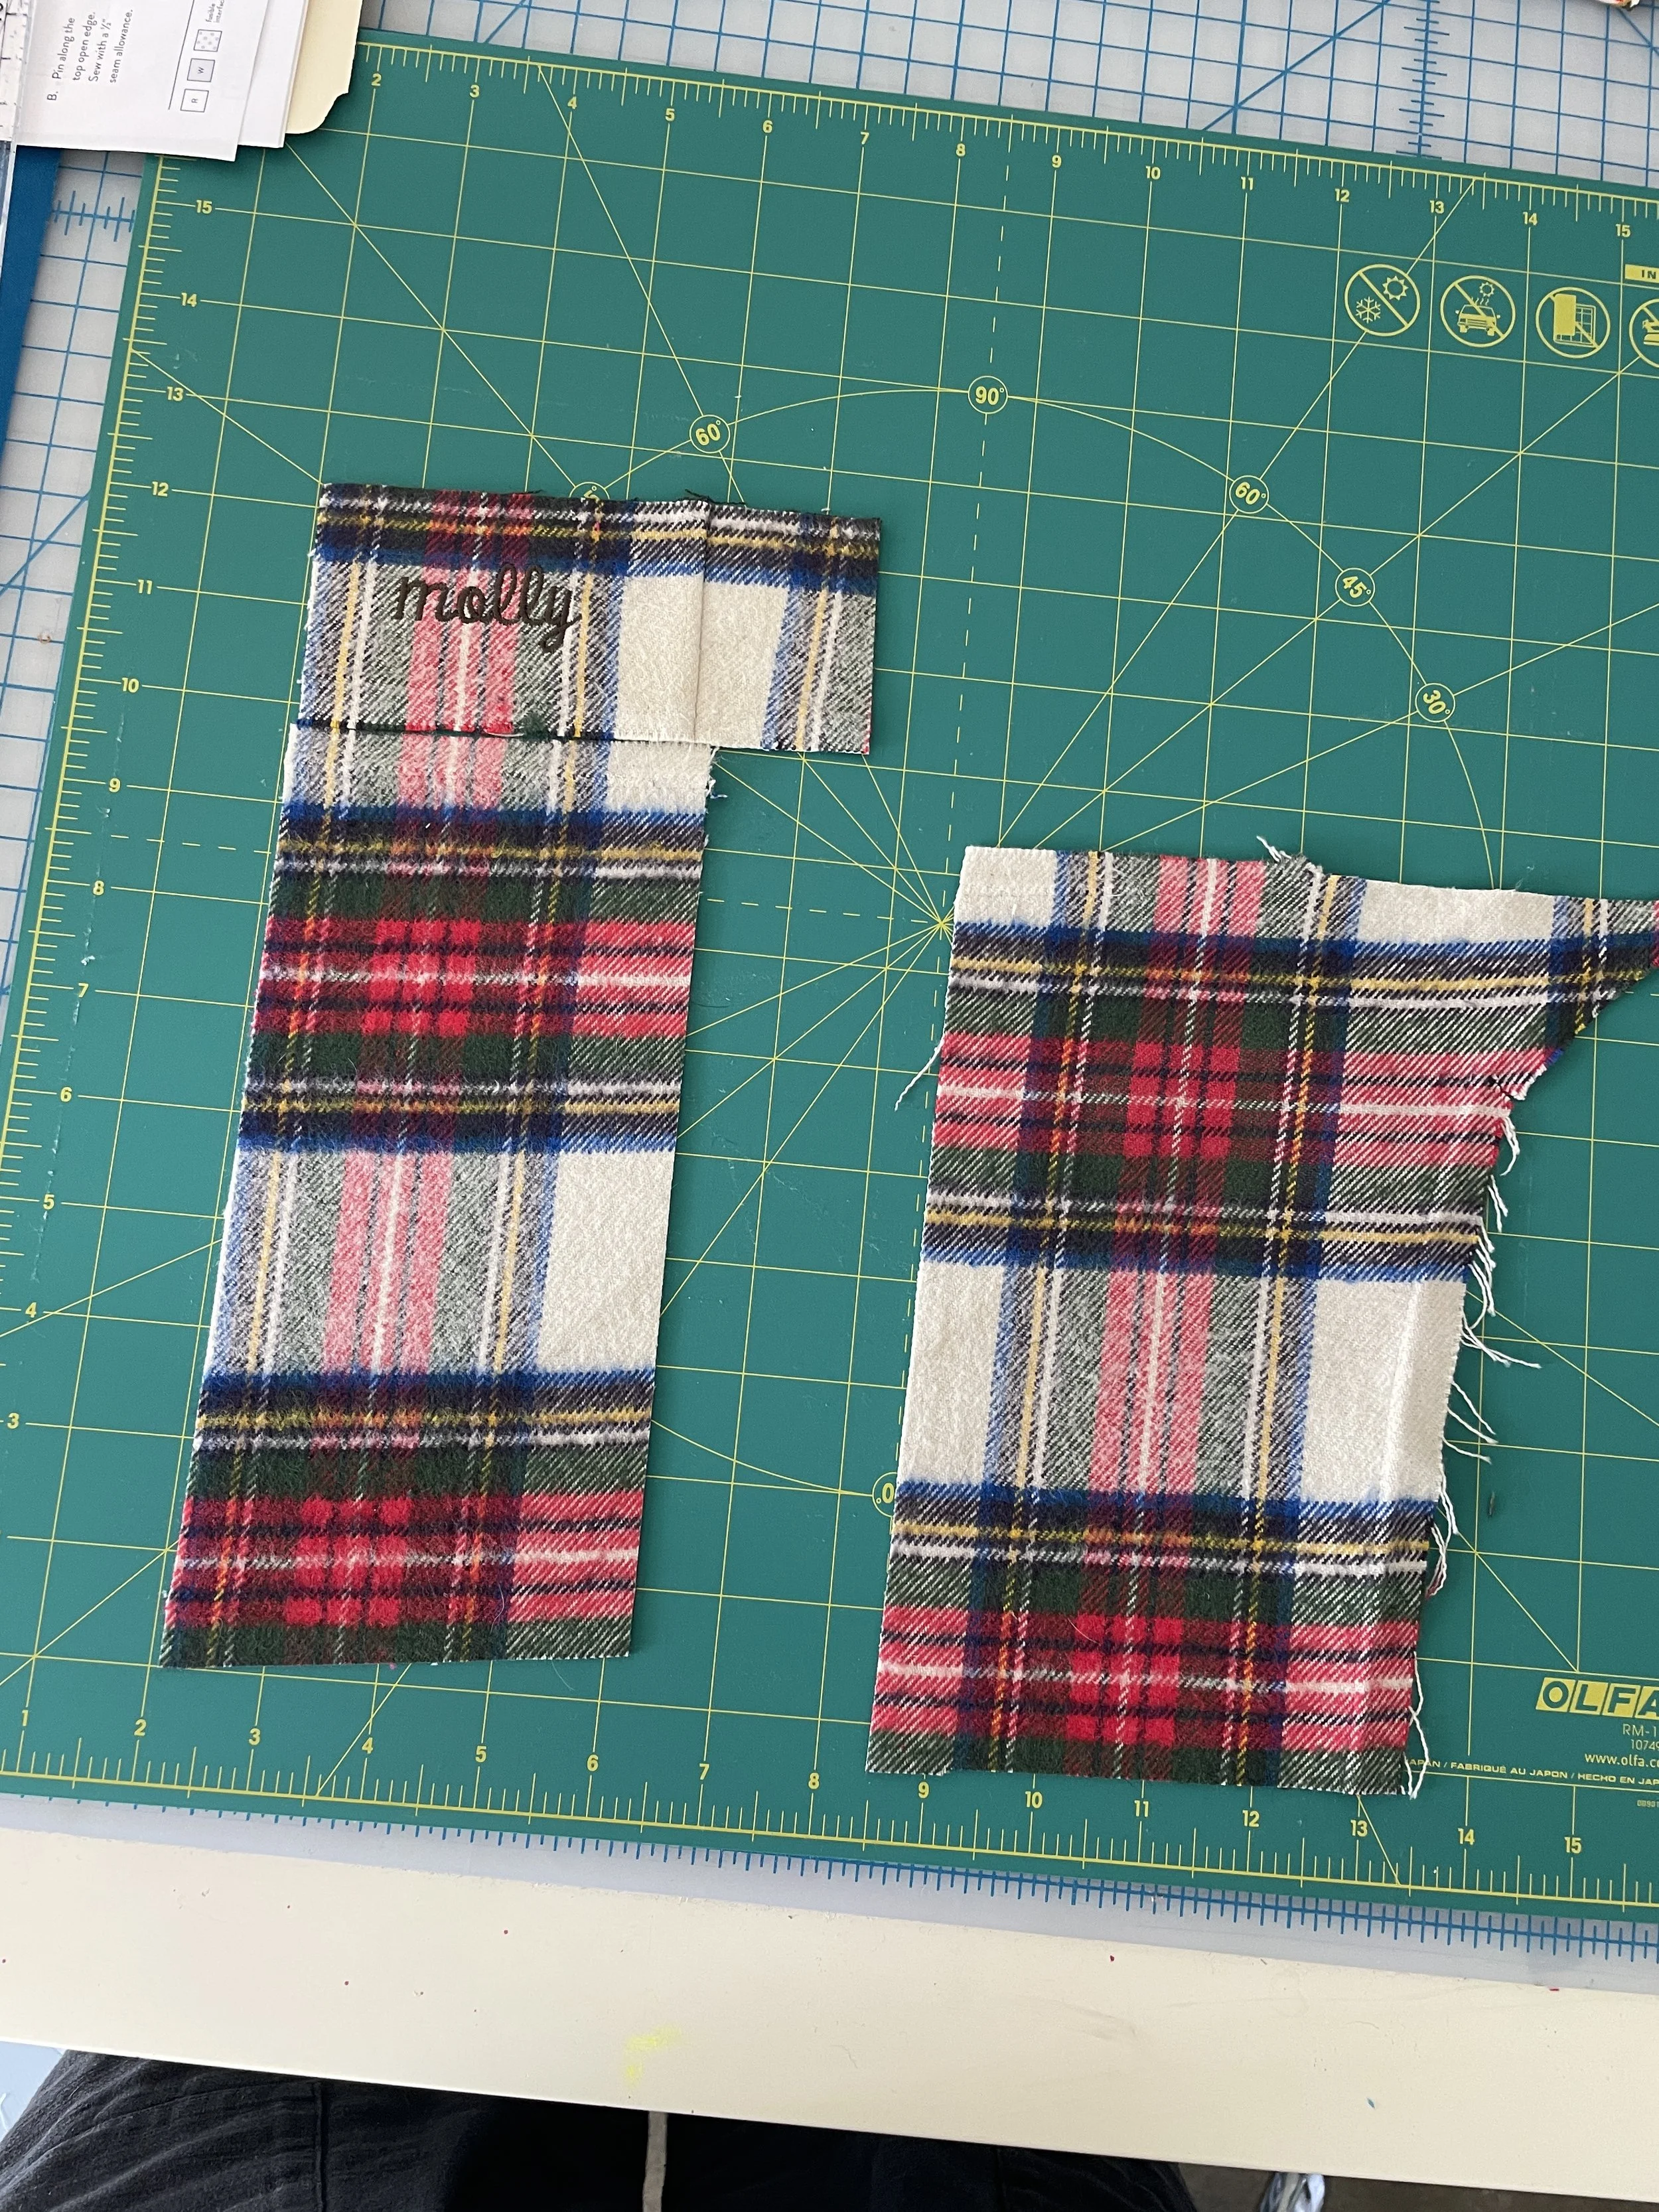
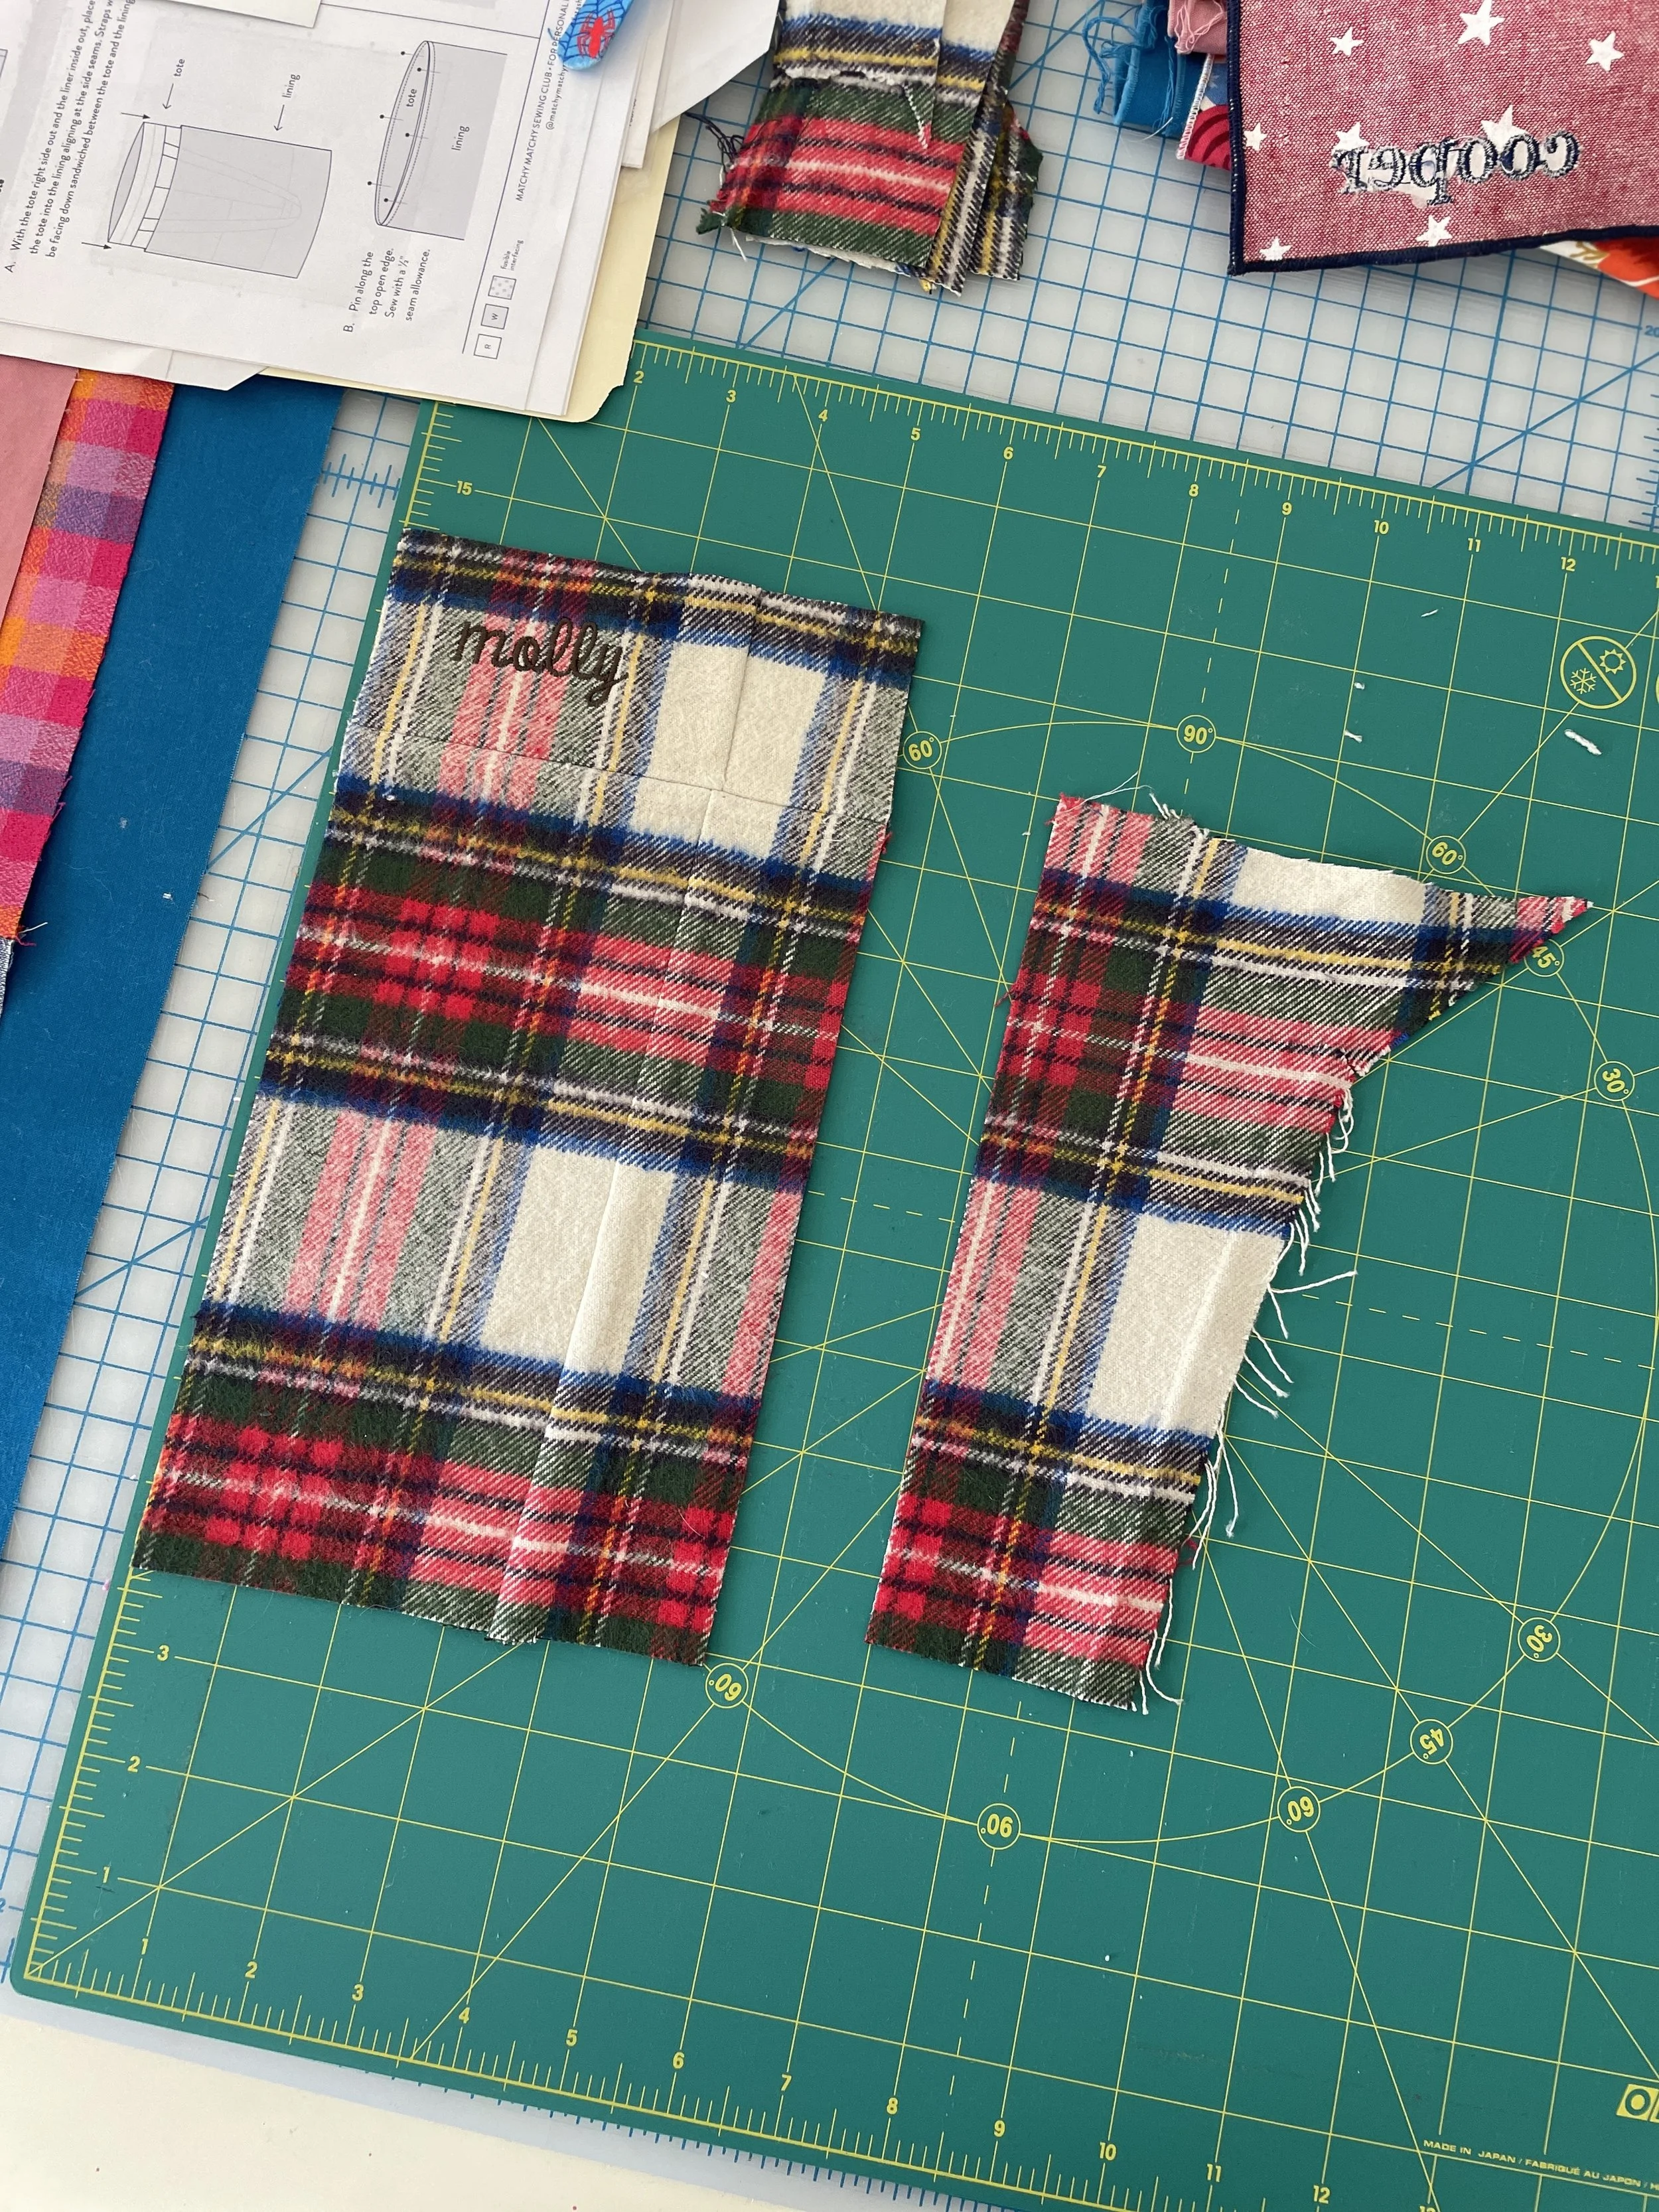
Even when seam ripped and opened, the smaller triangle bandanas had limits to what they could be used for. Unless cut apart and sewn into different, larger shapes— pattern allowing, they best served smaller spaces. They were also the pieces with six embroidered names… and fixed placement… on a pattern to consider.
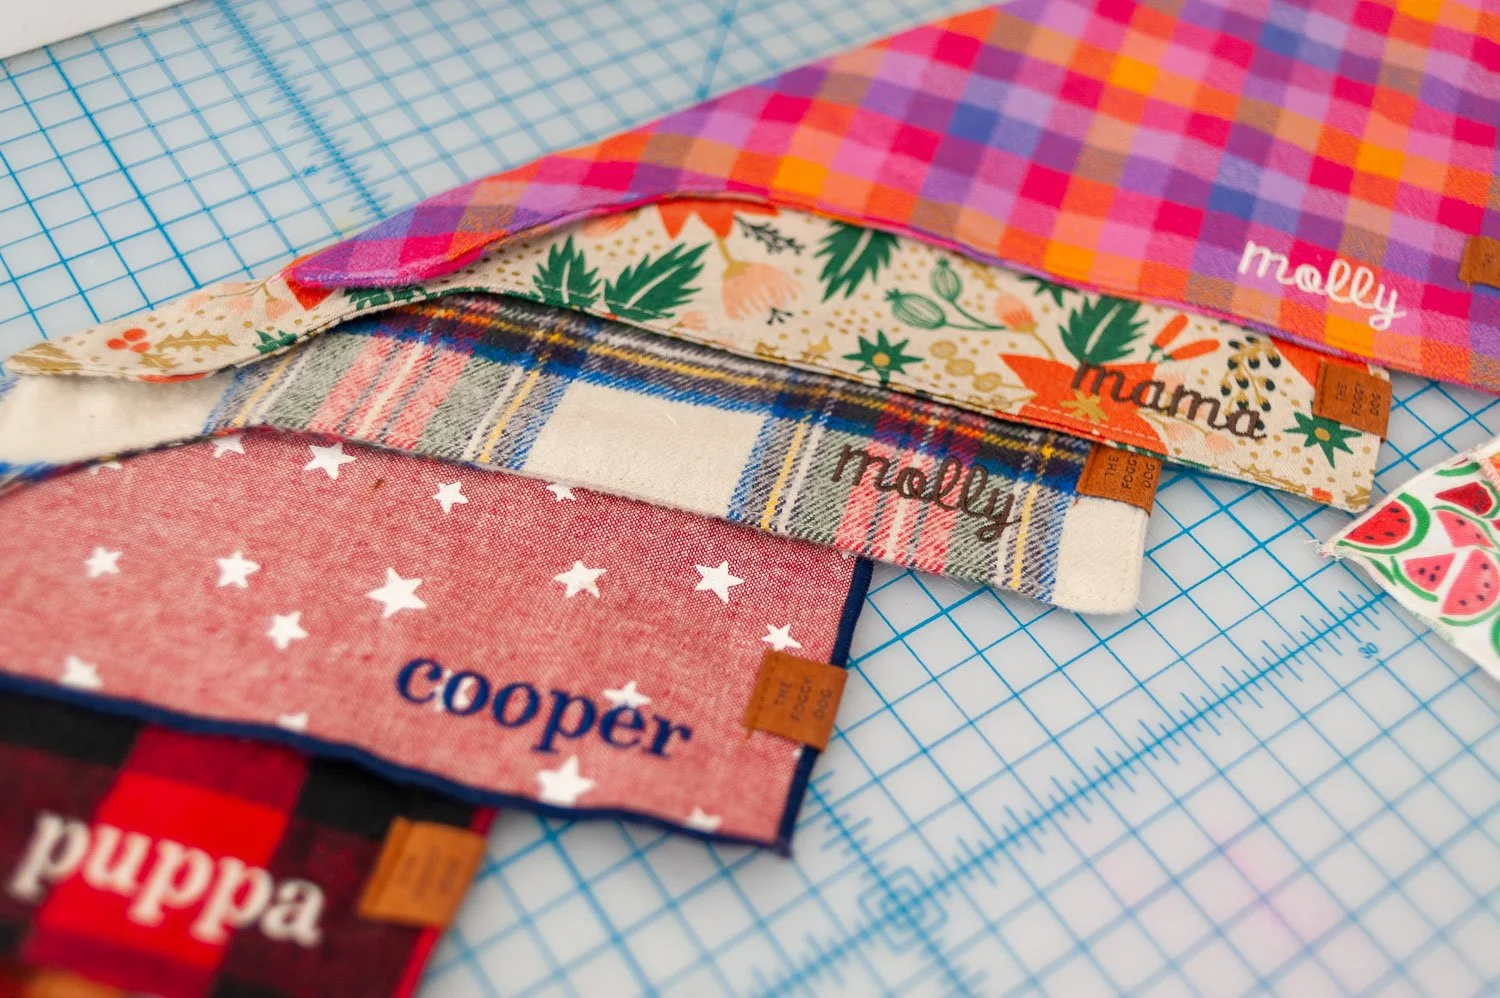
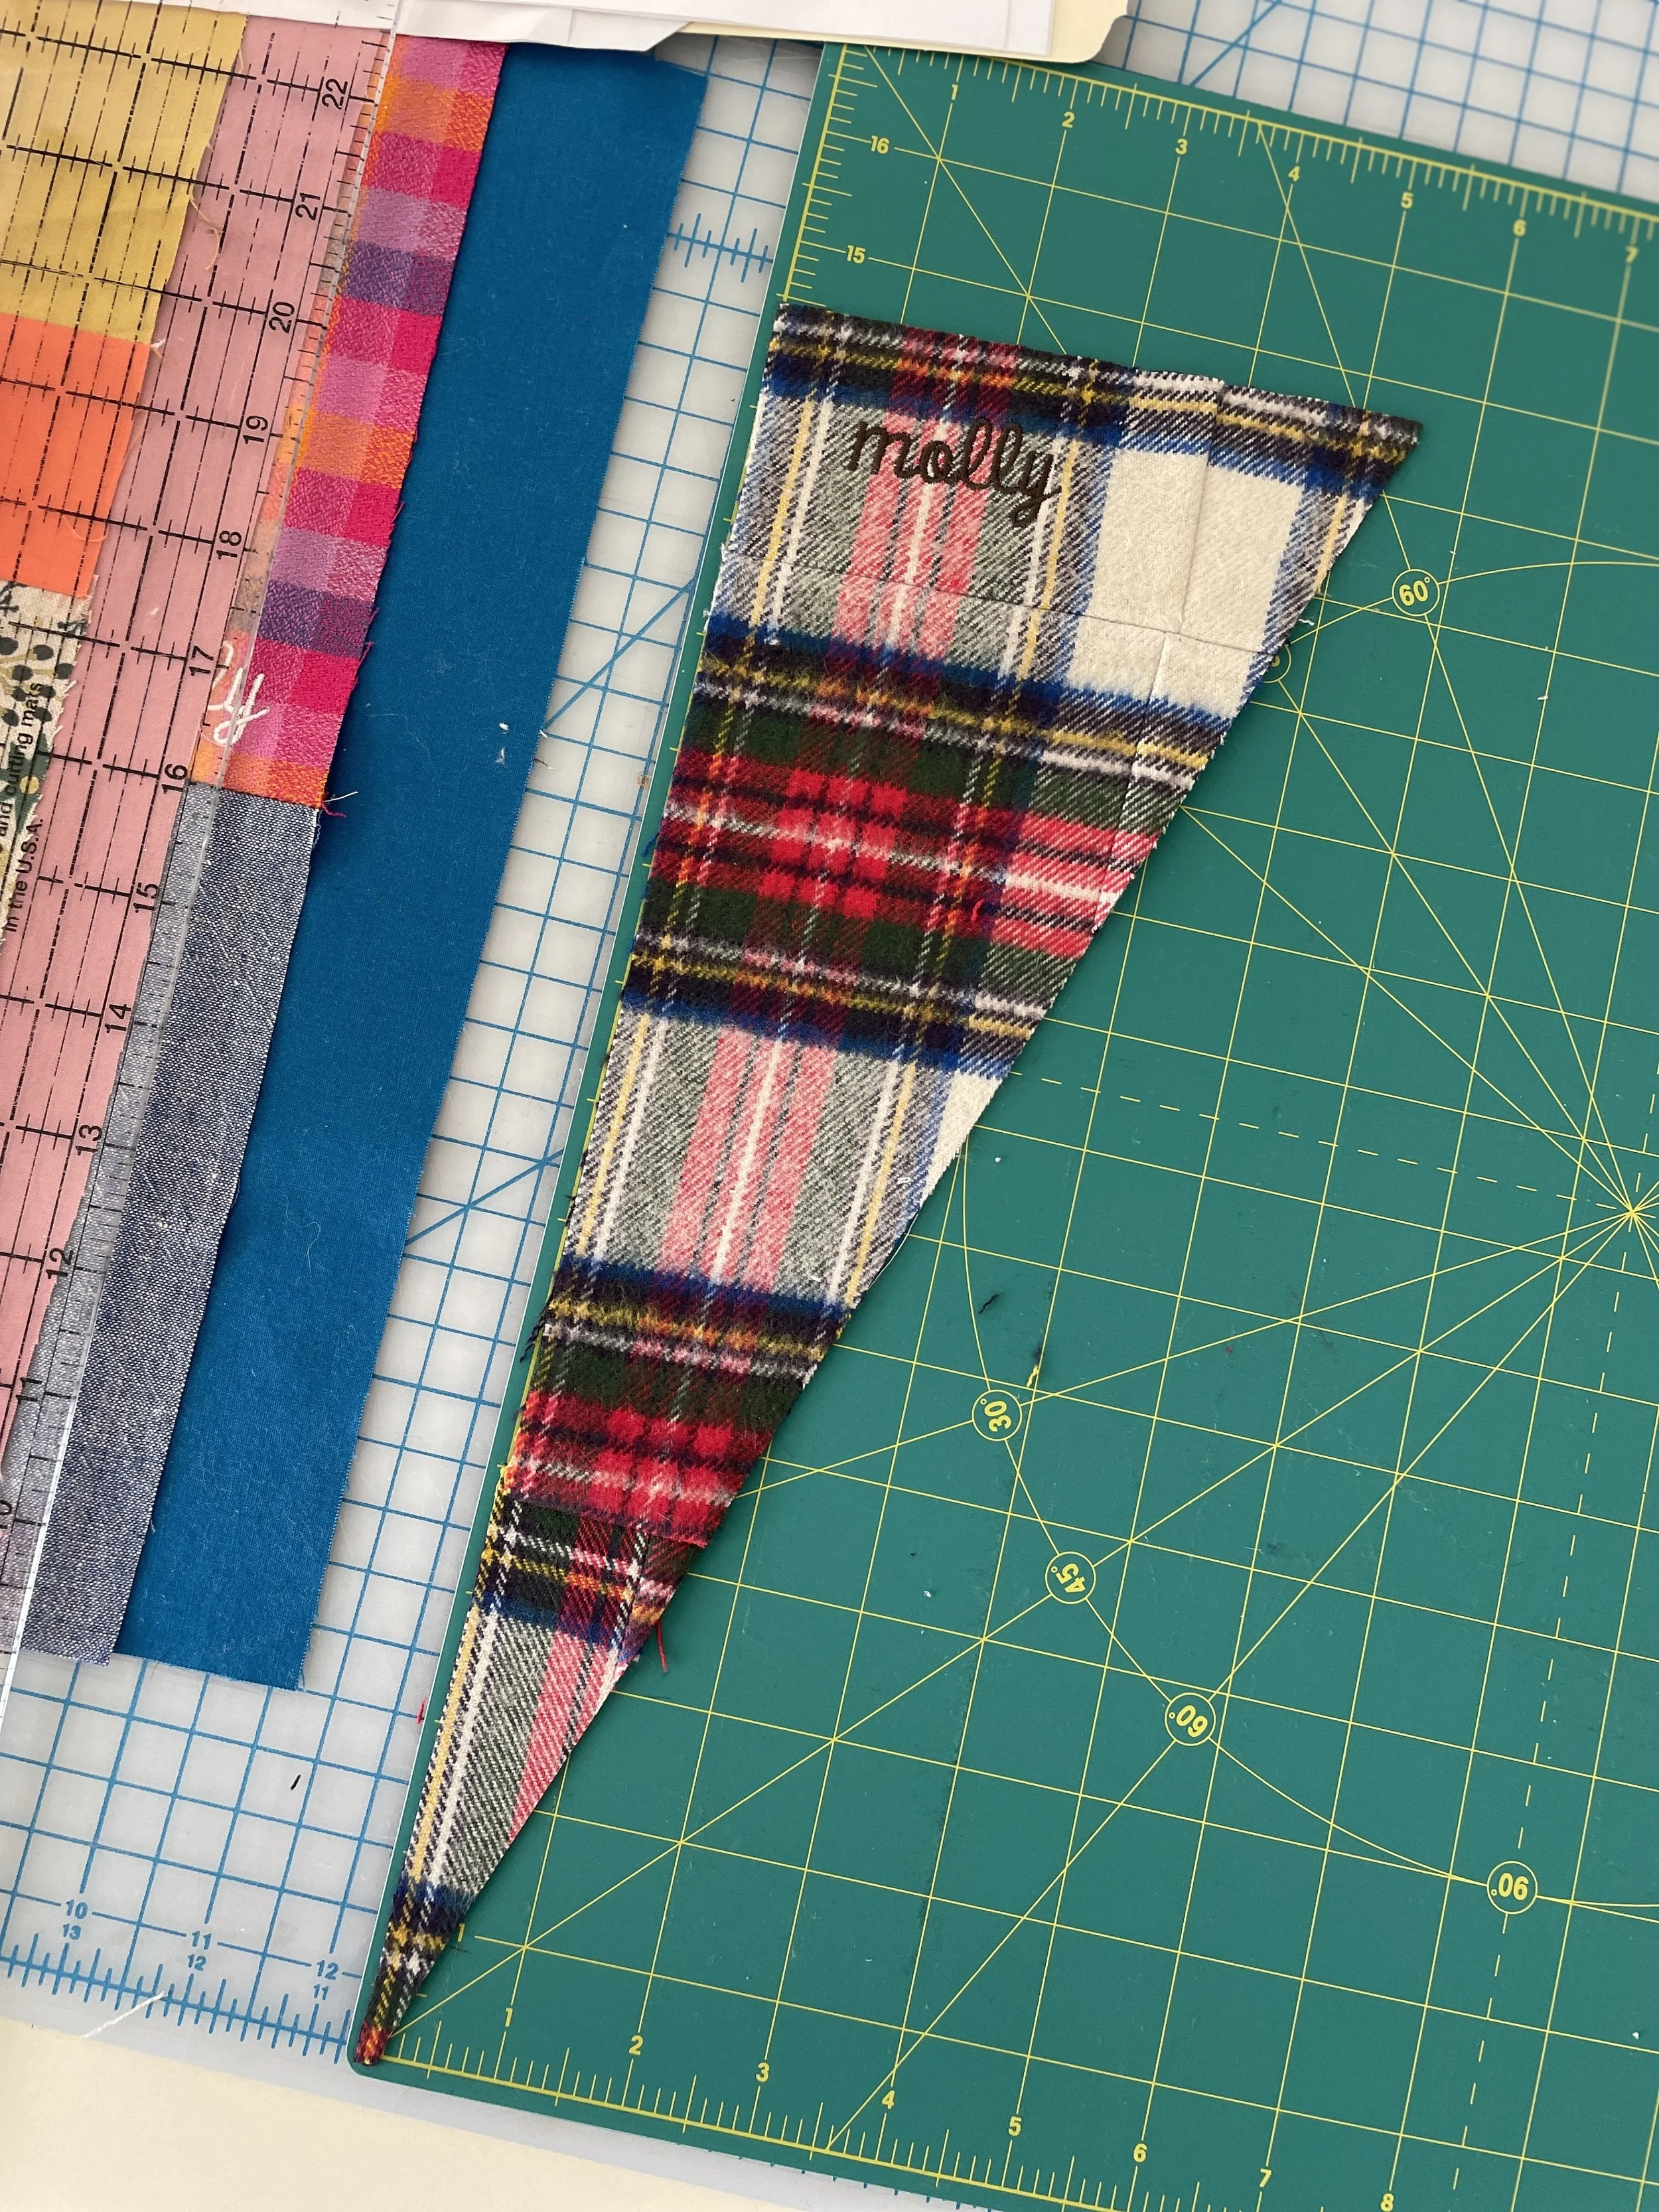
Here was a bandana that did receive some Frankensteining. As you can see by the leftovers… I barely had enough fabric to create the taller triangular figuration, while placing “Molly” in the upper lefthand corner, and match the plaid patterning.
Once everything was cut, I began assembling:


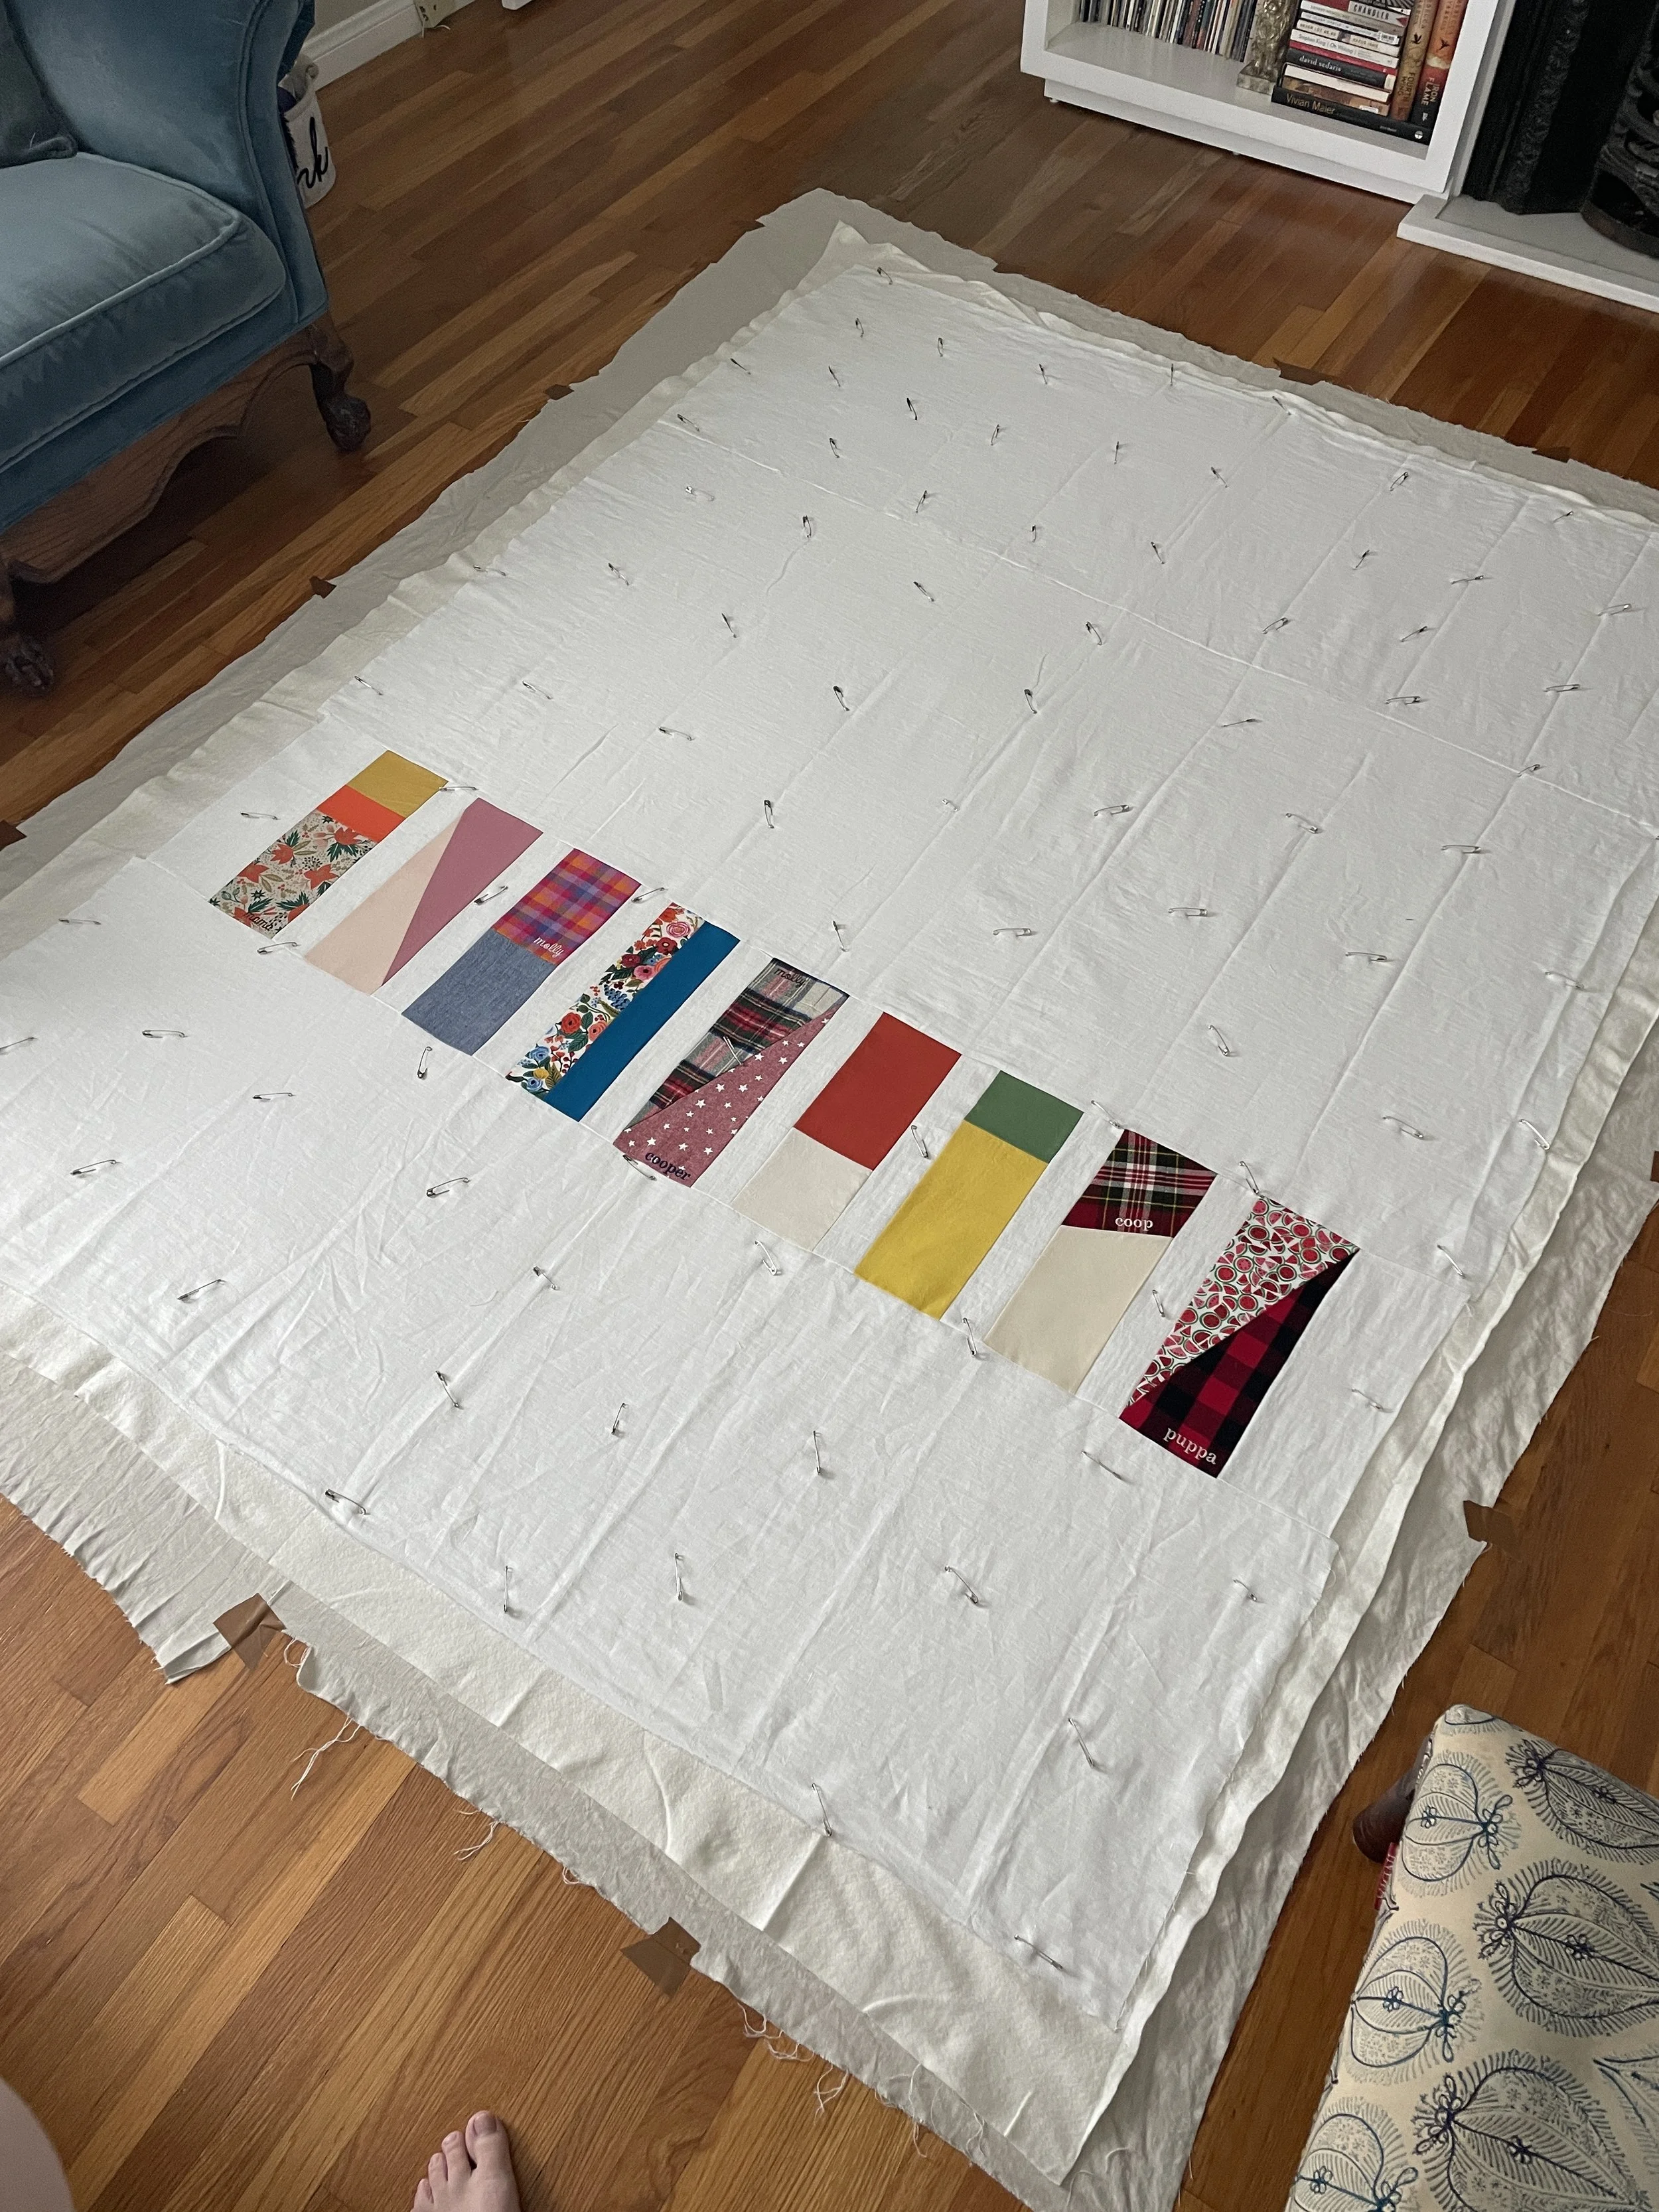
Followed by basting |
On a large, smooth and flat area:
place the quilt backing down with seams facing up
secure in place (tape to floor)
place the batting (center layer) next
place the quilt top, with the “right” side facing up
working from the center outward, safety pin the layers together; no more than a hand width apart, smoothing out air pockets and ripples as you go
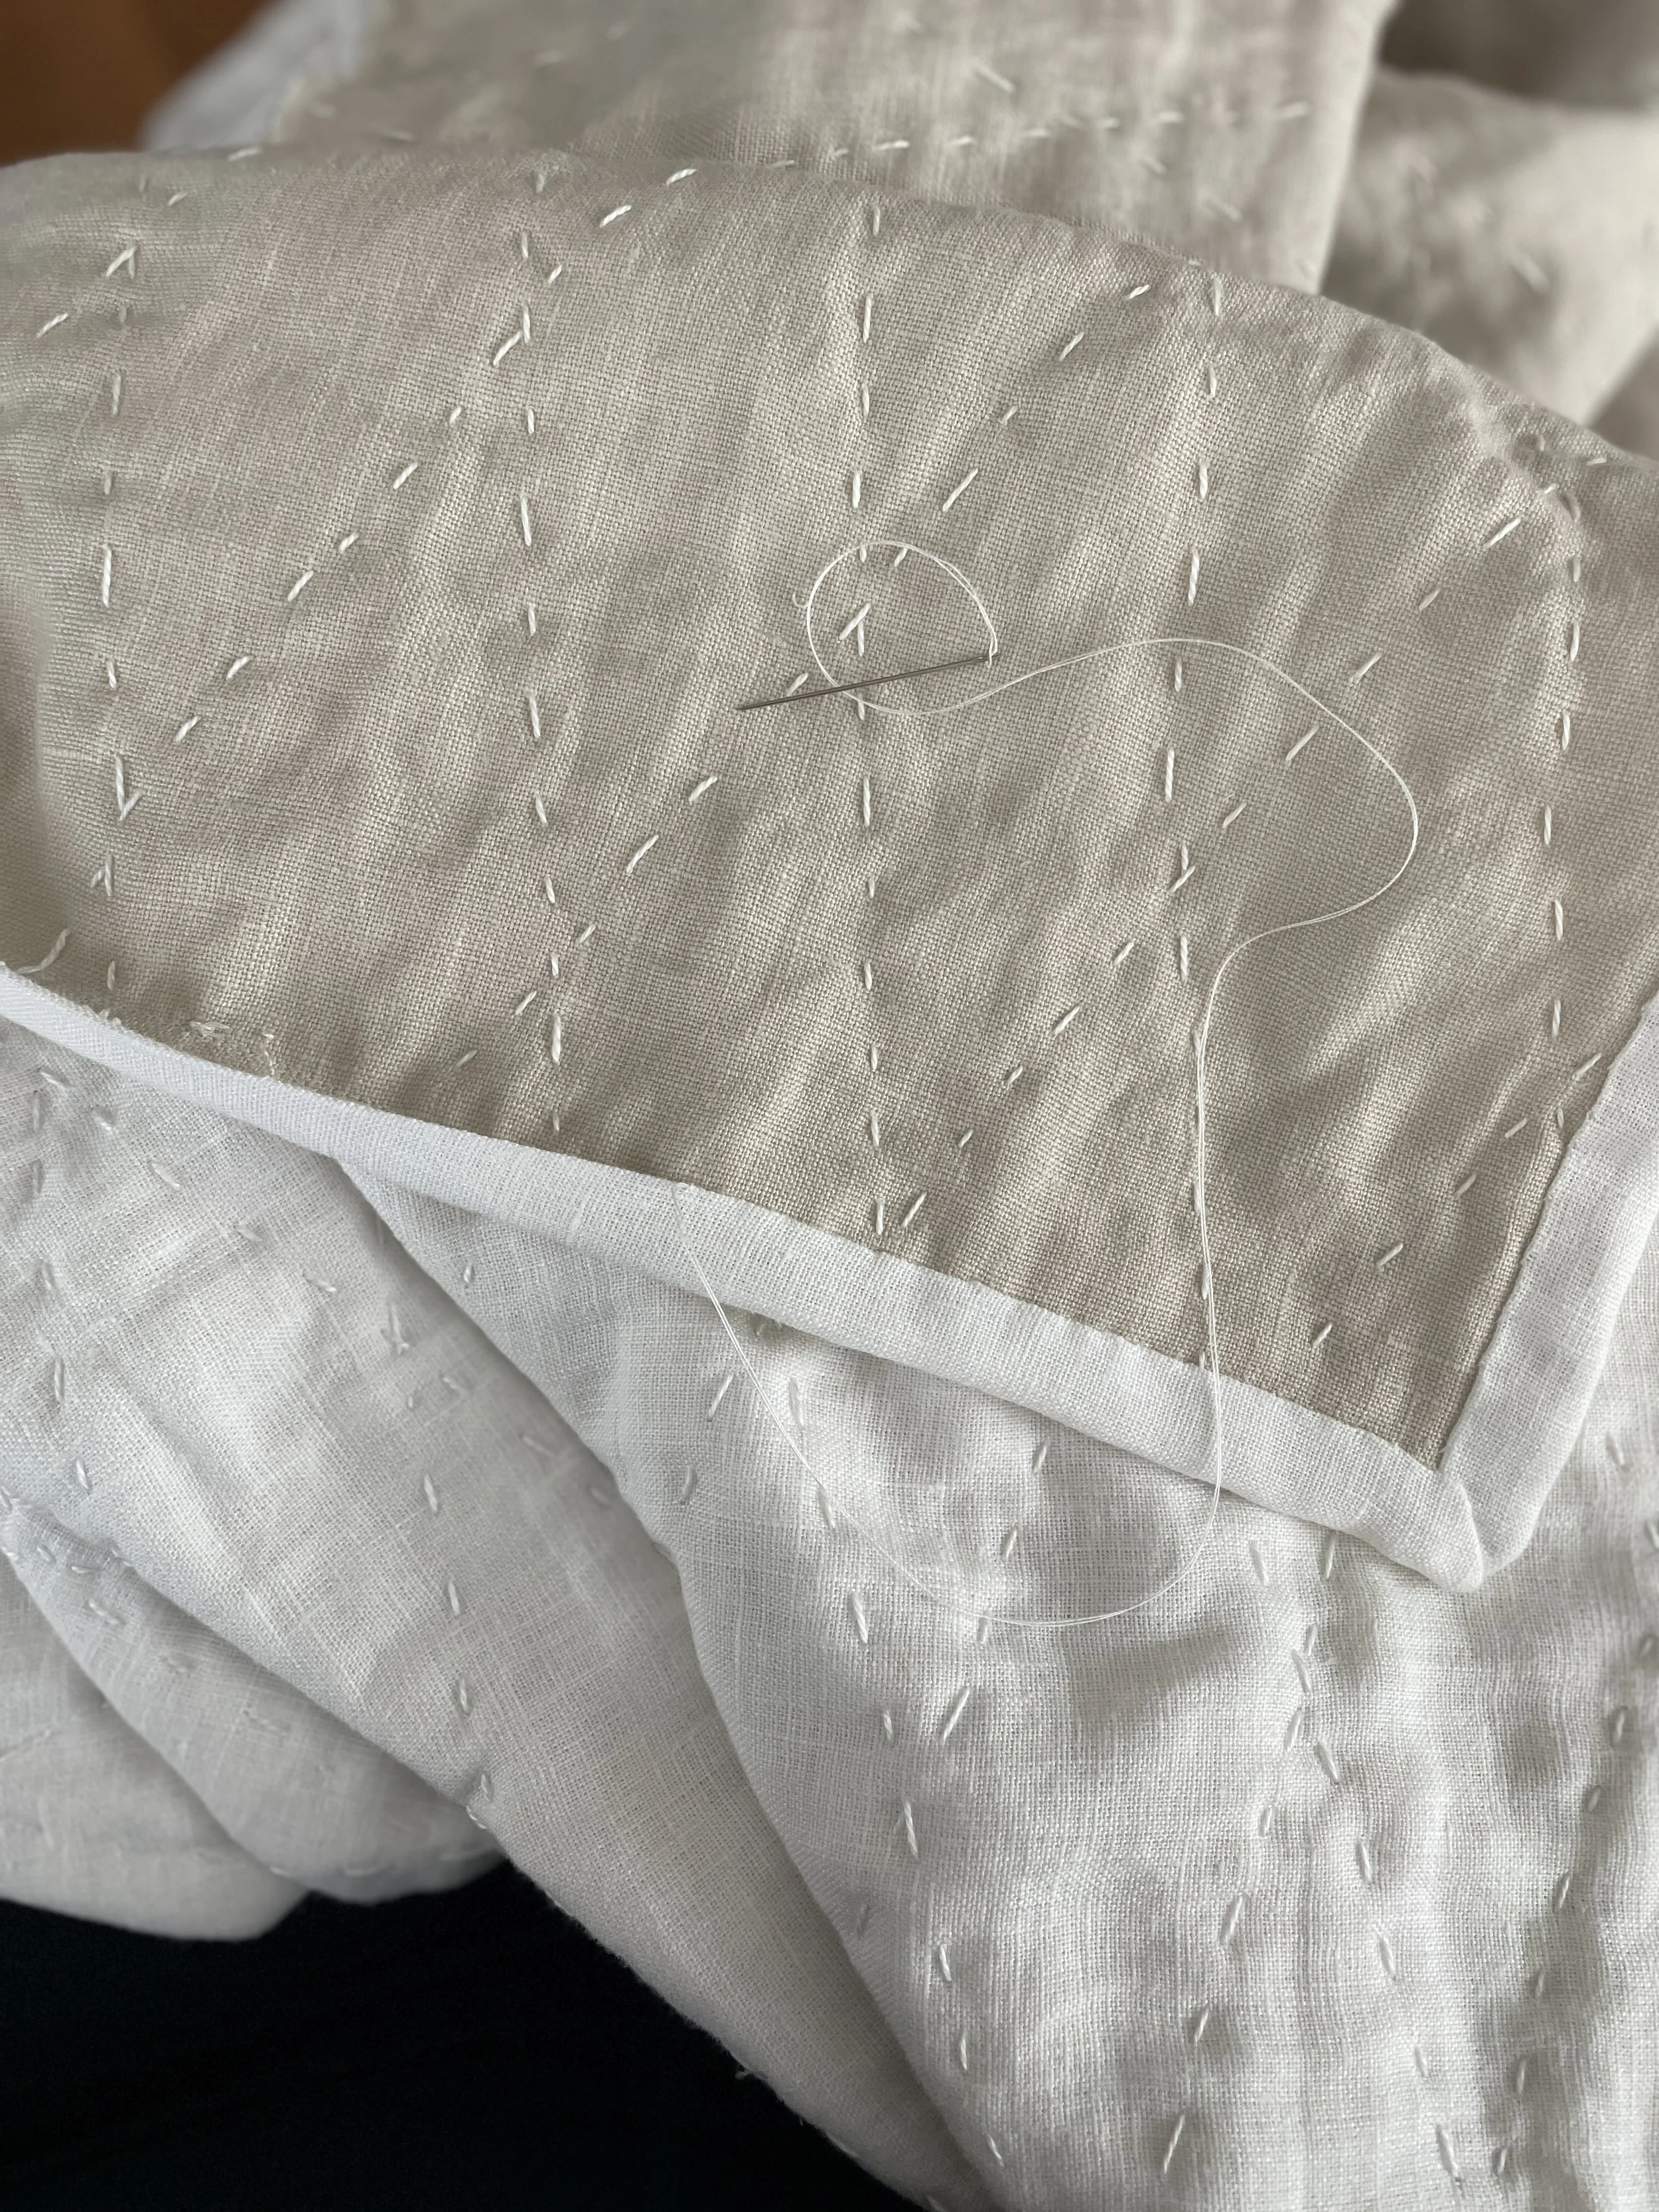
I used washi tape to mark my quilting lines, peeling off the pieces as I completed rows.


This took me approximately sixty hours to hand quilt.


Time to trim the excess fabric.
Even though I tied secure knots at the end of each row, I also machine stitched the entire perimeter {securing every row further} knowing it would be invisible under the binding.
I hope every quilt of mine is a treasured heirloom, passed down from generation to generation— and I construct with that intention in mind.


I made the binding from the same white linen used for the quilt top. It was machine stitched to the front, and hand stitched to the back.

Tah-dah!


Leftover bandana pieces and off-cuts. A perfect patch kit, if needed. Because, heirlooms.

It was such an honor to work on this piece. And I’m so thankful to Karen for entrusting me with her vision, and for her flexibility and graciousness throughout the entire process.
If you have a custom project of your own, and would like to collaborate, send the details to me here.
I’m currently accepting new commissions.
All content is owned by Tifanie White | studio. Unauthorized use including reproduction, distribution, reposting, downloading and transferring is prohibited.